JobServer.NET for Windows Administrators Guide

“JobServer.NET” and “JobServer.NET for Windows” are trademarks of XCENT
JobServer.NET for Windows Copyright 2008-2026 XCENT
Table of Contents
- Table of Contents
- Introduction
- JobServer.NET Platform
- Getting Started with JobServer.NET
- Job Definitions
- Job Triggers
- Job Steps
- Job Modules
- Connections
- Global Variables
- Job Monitor
- Job History and Log
- Managing Multiple Job Servers
- Pre-Installed Triggers
- JobServer.NET Installed Modules
- [ActiveDirectory] Find Users
- [Email] Send Message
- [Excel] Template Merge
- [Facebook] Post Message
- [Files] Are Identical
- [Files] Checksum
- [Files] Compress
- [Files] Contains
- [Files] Copy/Move
- [Files] Decode Base64
- [Files] Decompress
- [Files] Delete
- [Files] Delimiter Convert
- [Files] Download Zone Info
- [Files] Encode Base64
- [Files] Find
- [Files] Find And Replace
- [Files] Generate Filename
- [Files] Join
- [Files] Mutex Lock
- [Files] Mutex Unlock
- [Files] Pick Subset
- [Files] Read
- [Files] Render FileList as Html
- [Files] Set Attributes
- [Files] Split
- [Files] Text Convert
- [Files] Touch
- [Files] Validate Checksum
- [Files] Write
- [Folders] Check Size
- [Folders] Create
- [Folders] Delete
- [FTP] Copy/Move from Remote
- [FTP] Copy/Move to Remote
- [FTP] Delete from Remote
- [FTP] Find on Remote
- [Hyper-V] Action
- [Hyper-V] Checkpoint
- [IIS] Action
- [Images] Constrain
- [Images] Contact Sheet
- [Images] Encode
- [Images] Overlay
- [Images] Quantize
- [Images] Rotate
- [JSON] Minify
- [JSON] Prettify
- [JSON] Render Html
- [LogFiles] Archive
- [Logic] Branch
- [Logic] Compare And Branch
- [Logic] Contains
- [Logic] Stop
- [M365] Extract Attachments
- [Machine] Activate Power Plan
- [Machine] Hardware Inventory
- [Machine] Purge Downloads
- [Machine] Service Control
- [Machine] Shutdown/Restart
- [Network] Http Action
- [Network] Http Ping
- [Network] VPN
- [Parameter] Set
- [PDF] Merge
- [PDF] Password Maintenance
- [Perl] Execute
- [PGP] Decrypt
- [PGP] Encrypt
- [Python] Execute
- [Shell] Command Line
- [Shell] PowerShell Command
- [Shell] Sleep
- [Shell] Sleep Random
- [Slack] Send Message
- [SMS] Send Message
- [SQL Server] Agent
- [SQL Server] Create Tables
- [SQL Server] Execute
- [SQL Server] Export
- [SQL Server] Get Value
- [SQL Server] Import
- [SQL Server] SSAS Execute
- [Teams] Copy/Move From Remote
- [Teams] Copy/Move To Remote
- [Teams] Find Files
- [Teams] Send Message
- [Telegram] Send Message
- [Twitter] Send Message
- Custom Modules
- Requirements for Creating Custom Modules
- Creating a Custom Module with a Visual Studio Project
- Creating a New Custom Module
- Modifying an Existing Assembly to Become a Custom Module
- Installing a Custom Module in JobServer.NET
- Finding Out More on Creating Custom Modules
- Introducing FileGroups When Using FileLists
- Additional References
- Advanced Configuration
Introduction
JobServer.NET is a Business Process Automation (BPA) platform that is built both to provide a high degree of functionality right from the moment of installation, as well as also being a highly extendable framework for customization for and in alignment with your business practices and workflows. Starting with a simple pipeline process, existing manual processes can become fully automated in minutes. The JobServer.NET platform provides a variety of built in triggers and modules which enables many layers or combinations of operations to be defined for automation of varying complexity creating robust ways of solving workflow issues. These various processes can be completely internal to your operations, or extend all the way to any edge reaching directly out to your clients, vendors, or operational partners.
The extensibility of the platform provides a direct way for taking this existing functionality to the next level by implementing modules that can delve even deeper into areas that may be highly unique to your business requirements. As well as providing future modules and support for extending into systems using technologies such as Robotic Process Automation (RPA), RPAAI, and Hyperautomation.
JobServer.NET Platform
The JobServer.NET platform consists of multiple components which work together as a single cohesive system to provide a feature-rich apparatus for creating, managing, monitoring, and scheduling jobs. An individual job can range from a simple one step process up to a comprehensive set of steps working in tandem to solve a more involved set of requirements.
Some examples of jobs that JobServer can perform out of the box, without any custom programming:
- Twice a week, copy files from a local folder to an FTP server.
- Every night at 3:00 AM, look for new log files and compress them.
- Watch a folder, and if it contains any files over a certain age, compress them to an archive folder.
- Watch a folder, and if any new image files appear, resize and/or rotate them.
- Monitor a disk drive or network volume and generate a warning email if free space dips below 15%.
- Four times a day, only on weekdays, execute a SQL command.
- Send a notification if a remote server cannot be pinged.
The major components which make up the JobServer.NET platform is described below to provide an overview of their respective roles.
JobServer.NET Service
The JobServer.NET Service is the main component of the entire system. It is the scheduling and application platform that everything else communicates with. This runs as a standard Windows service which you will see listed as XCENT JobServer.NET. Once installed, the JobServer.NET service should always be running and under normal conditions should only ever be stopped when the Operating System is shutting down or restarting, or when an update to JobServer.NET is being installed.

JobServer.NET Manager
The JobServer.NET Manager is a Windows desktop application which can be installed and run on the same machine running the JobServer.NET Service, or any machine which can communicate with it. Typically, this means when JobServer.NET is installed on a machine on a private network, any machines you want to use the management application from should also be located on the same private network. When you start the management application, it will prompt for an authorized login. When the service is installed on a machine that is an Active Directory (AD) member, a valid login will be the same as your AD credentials for any administrator accounts on your network. When the service is installed on a machine that is not part of an Active Directory network, then any administrator account on that machine can be used as a valid login. Additional authorization options can be found under Authentication Options in the Advanced Configuration section.

Once you are successfully logged in, the initial management application should just show your connected server and will have no jobs defined initially.
JobServer.NET Mobile Manager
Enterprise licenses of JobServer.NET will soon have the optional feature of a mobile management application for Android and iOS phones and mobile devices. Enterprise subscriptions and licensees with an active maintenance package will receive notification about the availability of the mobile management application as soon as it is released.
JobServer.NET Plugins
Plugins in JobServer.NET run directly within the JobServer.NET service. There are distinct types of plugins, Triggers and Modules. Each type has its own role within the system.
Triggers
A trigger is simply a component that can start a job.
Each trigger has its own settings that configure the conditions needed for the JobServer service to load and run a given job definition.
Probably the most used trigger is the Scheduler, which allows you to define a date and time to start running a job definition and has a multitude of recurrence options.
The next most used trigger would be the File Watcher. This trigger allows JobServer to monitor a specific folder for any new or changed files in that folder.
The Pre-Installed Triggers section outlines in detail all the triggers pre-installed with JobServer.NET.
Modules
A module within JobServer is a component which can be used by a job to perform a specific task or action. A job consists of one or more steps that execute modules, optionally started by a trigger.
A very frequently used combination for the Scheduler trigger might be to use the [Files] Delete module to clean up old log files an application might leave behind by running at a late hour every Sunday night.
Another commonly used combination might take the File Watcher trigger and use it in combination with the [Files] Copy/Move module to copy the files to another location on the machine or on your network.
The Installed Modules section discusses in detail the many useful modules included with JobServer.
The Custom Modules section provides information on creating your own modules. One of the most useful features of the JobServer.NET platform is that C# developers can create their own modules and combine them with all the other pre-installed triggers and modules available.
Getting Started with JobServer.NET
Installation Requirements
Both the JobServer.NET Service and the JobServer.NET Manager are built using Microsoft .NET Framework 4.8 and inherit a portion of the minimum system requirements based on this. Either or both can be installed on any 64-bit version of Windows 7 or later, and Windows Server 2008 R2 SP1 or later. This includes:
| Windows Server Versions | Windows (Desktop) Versions |
|---|---|
| Windows 2025 | Windows 11 |
| Windows 2022 | Windows 10 |
| Windows 2019 | Windows 8.1 |
| Windows 2016 | Windows 8 |
| Windows Server 2012 R2 | Windows 7 |
| Windows Server 2012 | |
| Windows Server 2008 R2 SP1 | |
Note: versions of Windows Server 2008 and earlier (Windows 2003, Windows 2000, etc.), are not supported due to Microsoft not supporting installation of versions of the .NET framework greater than 4.5 for these older operating systems.
Minimum available disk space requirements: 500 MB (Recommended: 1GB)
While the basic installation of the service and manager applications do not have a heavy storage requirement, the amount of actual disk space required once you start adding jobs can vary significantly based on your configuration settings. Additionally, if your machine does not have the minimum required version of Microsoft .NET Framework installed, this does not account for space that might be needed to update your installed version of the .NET Framework.
Minimum available memory requirements: 256 MB (Recommend: 1GB)
While the basic installation of the service and manager applications do not have a heavy memory requirement, the use of the various plug-ins and how you may configure them will have the potential to require more available memory to function or to extract best system performance. Jobs will require additional memory only while they are running and automatically free up resources when complete.
For machines where only the manager application will be installed, both the disk space and memory requirements are significantly reduced.
Prerequisites
Versions of Windows 10 (version 1703) and earlier, as well as Windows Server 2016 and earlier may need to have Microsoft .NET Framework installed or updated before installation can complete. For these older versions, Framework 4.8 or later will need to be installed. For newer versions of Windows and Windows Server, a compatible version of .NET Framework is already installed by default.
Download and Installation
Depending on where you received or viewed this documentation from, we we want to make it clear and obvious that to get the genuine and most recent installation package for JobServer.NET, all you need to do is go to https://jobserver.net/downloads. The installation package allows you to choose if you are installing just the Service, Manager, or other related tools. Just this one installer is needed no matter which parts of JobServer.NET you need to set up. When you run the installer, it will default to installing most of the options. If you only need Manager, then deselect all options except the Manager. Otherwise for most installations, the default options are all you need.

When the installer runs, any prerequisites that are not detected will be prompted for installation, such as minimum required Microsoft .NET Framework. Once the installer has completed, the Service will be running in the background which can be seen by viewing the Windows Services app (previously also found in Control Panel in older OS versions). It should provide you with the option to start the newly installed Manager application.
When running the Manager application, it should become apparent that JobServer.NET integrates immediately into your existing network configuration. There is not a default account or password to connect the Manager application to the Service application as due to this integration with Windows security, your login to JobServer.NET is tied to your Windows network or machine credentials. Thus, to login the first time, your available methods will depend on if your machine is running as a domain member on your network or is a standalone or workgroup machine.
For machines that are domain members, then your login credentials are your standard Active Directory network credentials for any accounts that are administrators or have had JobServer.NET based groups assigned to them. See the Authentication Options section if you prefer to use accounts that are not administrators.
For machines that are not domain members, then your login credentials are your local machine-based login credentials. This means you just use the same login and password you would use to login to an administrator account on the machine. The same JobServer.NET based groups can be defined on a local machine’s accounts if you prefer to not use the administrator account(s).

Once you successfully login for the first time on a given machine with a new installation, you will be automatically prompted to create your first job. If you have any trouble logging into the Manager application, see the online guide at https://kb.jobserver.net/Q100001 for a guided tour on diagnosing issues with connections or authentication.
The rest of this section will walk you through the basics of setting up and creating some example jobs and getting you familiar with the overall features you need to get started with using JobServer.NET.
Settings
The JobServer.NET Service operates in an invisible fashion if you do not actively have the Manager application open and are sitting and watching it. Of course, this is exactly what it should be doing most of the time. But on the occasions when something happens or a problem is detected, it can notify you or your team about any of these detected issues. It does this by sending a notification. Notifications can go to one or more team members via email and the Notification Settings option is how you configure this.
To configure email notifications, you will need the connection information for your network’s SMTP email server. The connection information options are described here to help guide you. Once you have entered the correct details, you can use the Test button on the settings form to send a test notification from JobServer.NET. Keep in mind that the test feature sends the notification email immediately, but depending on your email configuration, it might take some time for it to arrive. It is not unusual for externally hosted email services to take a couple of minutes to show new messages in your inbox.
If you have any trouble with your notification settings, see the online guide at https://kb.jobserver.net/Q100002 for a guide on configuring SMTP connections.
| Setting | Description |
|---|---|
| SMTP Server | The fully qualified URL to your email server. If you need to specify a port different from the default port, you can specify it by adding a colon and the desired port number after the URL. Examples: smtp.example.com, smtp.example.com:2525 |
| Username | If the above email server requires authentication, then the username for the account should be specified here. Note that many times these account names will look like or are the same as the sending email address, but this is not always true. Example: user@example.com |
| Password | If the email server requires authentication, then this will be the password for the account specified with the username setting. |
| Use Secure Transport | If the email server requires or allows encrypted communications, this option should be checked to turn on the encryption option. Most modern email servers support this and we highly recommend using encryption if it is available. Many mail servers are starting to require all connections to be encrypted. |
| Send As | The email address of the account that the email sent by JobServer.NET appears to come from. Some email servers may require this to be a valid email address. Otherwise, a common option here is to put a non-existent address so if someone accidentally replies to it, they will get a bounced message right away. Note: this should always just be a single email address. Examples: noreply@example.com, support@example.com |
| Deliver To | The email addresses of the accounts that should receive notification messages. If your email server supports group addresses and you have one defined for the role, then we highly recommend putting just the defined group address here. Otherwise, you can specify any number of recipients for notifications by simply separating email addresses with a comma. Examples: admin@example.com, jean@example.com, joe@example.com, itsupport@example.com |
Layout of the Manager Application
Once you are logged into the manager application, you can see that there are three main elements to the application’s layout. Below the menu bar on the manager window is the main toolbar. Most of the buttons on the main toolbar are not enabled and cannot be used until you have taken some other steps which we will get to shortly. The two buttons that are always enabled are the Connect Server button, which we will be addressing in one of the next sections. And there is the Help button which will open your default browser to the main help page for JobServer.NET.
Below the main toolbar, we see the rest of the window is split into two panels. The left-side panel is the navigation panel. The navigation panel will display our server connection(s) and hierarchical lists of jobs for each server. The right-side panel is the control area. As you perform various actions, they will open different windows in the control area. You may have multiple windows open in the control area and can switch between them as needed. In between the navigation panel and the control area, the bar can be grabbed with your pointer to resize the panels to best suit your display.

Prepare Test Folder Location
Since the following topics in this section will walk you through creating some example jobs, you will want to prepare for this by creating or picking an appropriate test folder location. Most Windows machines may have a temporary folder as C:\Temp. This should be fine for most people, but you can certainly pick any location that is more suitable. Just substitute your desired path for C:\Temp in the examples below. To start with, create a JobServer folder in C:\Temp, and then underneath the JobServer folder, create the following subfolders: Cleanup, OtherDept, and Pickup. You should wind up having the following folders:
- C:\Temp\JobServer\Cleanup
- C:\Temp\JobServer\OtherDept
- C:\Temp\JobServer\Pickup

If you need more detail than presented here to follow along with instead of the steps outlined in this section, see the guide at https://kb.jobserver.net/Q100003 for a more visual tutorial.
Creating a Schedule Based Job Definition
Once you have completed your notification settings, we can try setting up a sample schedule-based job definition. Schedule based jobs mean that you are going to run a job definition one or more times on some determinable date and time based pattern. This is done by using a Scheduler trigger and is one of the most used methods for starting jobs. When you need to pick up files from some location on your network, run and deliver some type of report, or perform updates of data in a database, the scheduler is a reliable building block to make these types of processes happen.
To start with creating an example scheduler, look at the manager application. In the navigation panel, it shows you the JobServer.NET machine(s) for which you are connected to. Under each server you can be connected to, you can see a view of the job definitions that are defined on each server. For a new installation, you will just see your connected JobServer.NET machine and no job definitions listed below it.

When you right click on your connected server, you will see a pop-up menu list of options for your server. Select the New Job option from the menu and in the control area will show a new empty job definition form. For the Name field, enter “Cleanup Old Temp Files”. Then from the Trigger field a few lines down, select the Scheduler option from the drop-down list.

Once you do, you will see a new dialog open with the options for the scheduler trigger. The first step of course is the only visible option so far, picking a Recurring option. Start off by picking the Once a day option, as the other options are covered in more detail later. The Start Date will default to the current date, so we just want to pick a time of day you want to cleanup some old files. Since JobServer.NET displays times in 24-hour format, pick a time suitable for you. We might recommend entering 23:00 so this job will run an hour before midnight each day. Click the Save button when you are ready.

At this point we have started defining this job and when we want it to run. Now we need to tell it what we want it to do. In the bottom section of the job definition, you want to locate and click on the button titled New Step. This will open the new job step dialog. The first field here is the Module field, click here to see the list of installed modules and locate the one called [Files] Find and click on it. This module is used to search for any number of eligible files that meet all the search criteria you might need.

When that has been selected, you should now see the Files Find module has loaded and is now showing all the configuration parameters available. Before we just to that, update the Name field by entering “Find Old Temp Files” into it. Then locate the first parameter called File Source and add a path to a folder on your JobServer.NET machine that contains some old files you no longer want to keep around. For testing, we will use one of the test folders we created above. So, for this example we are putting the folder path of “C:\Temp\JobServer\Cleanup” into the File source parameter. Next, we change the Age threshold type parameter to a value of Older. Then we set Age threshold value to 90. And finally set Age threshold units to Days.

This combination of options tells the Files-Find module that we want to find all files in this folder that are older than 90 days old. So, this step is selecting all the files that we are about to do something within the next step. We can now finish this step by clicking the Save button and returning to the main job definition.

We now have a job definition with a single step defined which retrieves a list of files. Next we want to do something with that list of files. We do this by adding another step after the first one by again clicking the New Step button. This time when we get the new job step dialog, we want to select the [Files] Delete module. Update the Name field by entering “Delete Old Files” into it. The File source parameter listed here just needs to be connected to the list of files that the previous step has found for us. To do that, select the Assign button on the line for the File source parameter. This is the button that looks like an equal sign. Once you do that, you will see the assignment dialog with a list of all the possible variable and parameter options. You want to locate the one from the FindFiles module in Step 1 with the output parameter of FileList. The FileList parameter name is used by [Files] Find and some other modules to output a list of files that the module has worked on or found in this example.

You can select the FileList output from the [Files] Find module and click the Select button. This now connects the output of [Files] Find to the FileSource input for this module in this step. When a parameter’s value is assigned, you should notice that the value part of the control now changes from an input box to a display showing the linked parameter. When you are ready, you can click the Save button to complete the [Files] Delete step.

Now that you have created this second step, it takes all the files found from the first step and deletes them. This is a good example of how you can clean up folders of old log files and other outdated files you may no longer want to keep around.

Once you click the Save button as the top of the job definition, you will see the job is added to the navigation panel under the server and the job is now active. It will clean up any of the older files it finds in the folder you specified at its scheduled time every day.

Running Ad-Hoc Jobs and Monitoring
You now have your first job ready to run. To try it out be sure to add some files to the folder you specified when you created job step 1 in the above exercise. Make sure some are files older than your age setting (older than 90 days if you followed the example exactly). And be sure to include files that are newer. But once you have done that, you do not want to wait until late at night to see what happens when the job is executed. We will see how you do that in just a moment. First, you want to locate the Monitor button on the toolbar of the Manager application and click it. This opens the monitor which shows you what jobs are queued and executing on JobServer.NET right now.

Now this next part will happen quickly, so you want to pay close attention to the monitor after this next step. You can start your job at any time (ad-hoc) and as soon as it starts, it will show up in the monitor and you will be able to see it run and finish. When you are ready to start your job, you want to right-click on your job name in the navigation panel and from the pop-up menu, pick the Start option. Your job will run right away when you click the start option.

Some job definitions, such as the one highlighted in these example screenshots, execute their job steps very quickly and you will have to watch carefully to see them display a running status. Most job definitions perform quite a bit more work and it would be easy to catch them in the running status.

After the job has finished running you will see it continues to display in the monitor for a few minutes afterwards. This is so you have a chance to view the very recently completed jobs in the monitor. Now review the files in your folder and you should be able to confirm that any files you placed there over the specified age have been successfully deleted.

Creating an Event Based Job Definition
After looking at the scheduler trigger, the other triggers have something in common. They are all event-based triggers, which means they all trigger when something external to JobServer.NET occurs and the trigger detects this change. Thus, some external event causes these types of triggers to have a job start executing.
One of the most popular of the event-based triggers is the FileWatcher trigger. This trigger can watch for file activity in a specified folder and respond to file changes in it. This can be very handy for numerous situations. Maybe you want to take files that are dropped into a folder and automatically compress them into a ZIP file. Or, perhaps you have some legacy system that can generate a bunch of files in a folder, but you need a way to email them out automatically to a supplier or vendor for processing.
To start with creating an example FileWatcher, create a new job definition by right clicking your server and selecting New Job. When the new job form appears, change the Name to “Copy Files to Other Department”. Then go to the Trigger field and select FileWatcher. When the parameters dialog for FileWatcher appears, go to the Folder path to watch setting and add the value “C:\Temp\JobServer\Pickup”. Then in the Trigger actions field, select the All option. You can now click the Save button to finish creating the trigger.

Next create a step for this job by clicking the New Step button. In the Module field, select the [Files] Copy Move module. In the Name field, change the text to “Copy files from pickup to other dept”. Then in the parameters, we want to specify the File source as the example folder “C:\Temp\JobServer\Pickup”. Then select the Copy option for the Copy or Move parameter. And finally, you want to specify the Destination folder as “C:\Temp\JobServer\OtherDept” before you click the Save button to complete the settings for this step.

And finally, click the Save button on the job definition to create the new job. Once you do this, the job is now active and any files you place into the Pickup folder you created, will be immediately be copied to the OtherDept folder. This functionality works with files on local storage, or on network paths. The only requirement is that the JobServer.NET service must have permissions to the filesystem the files and folders are stored on.

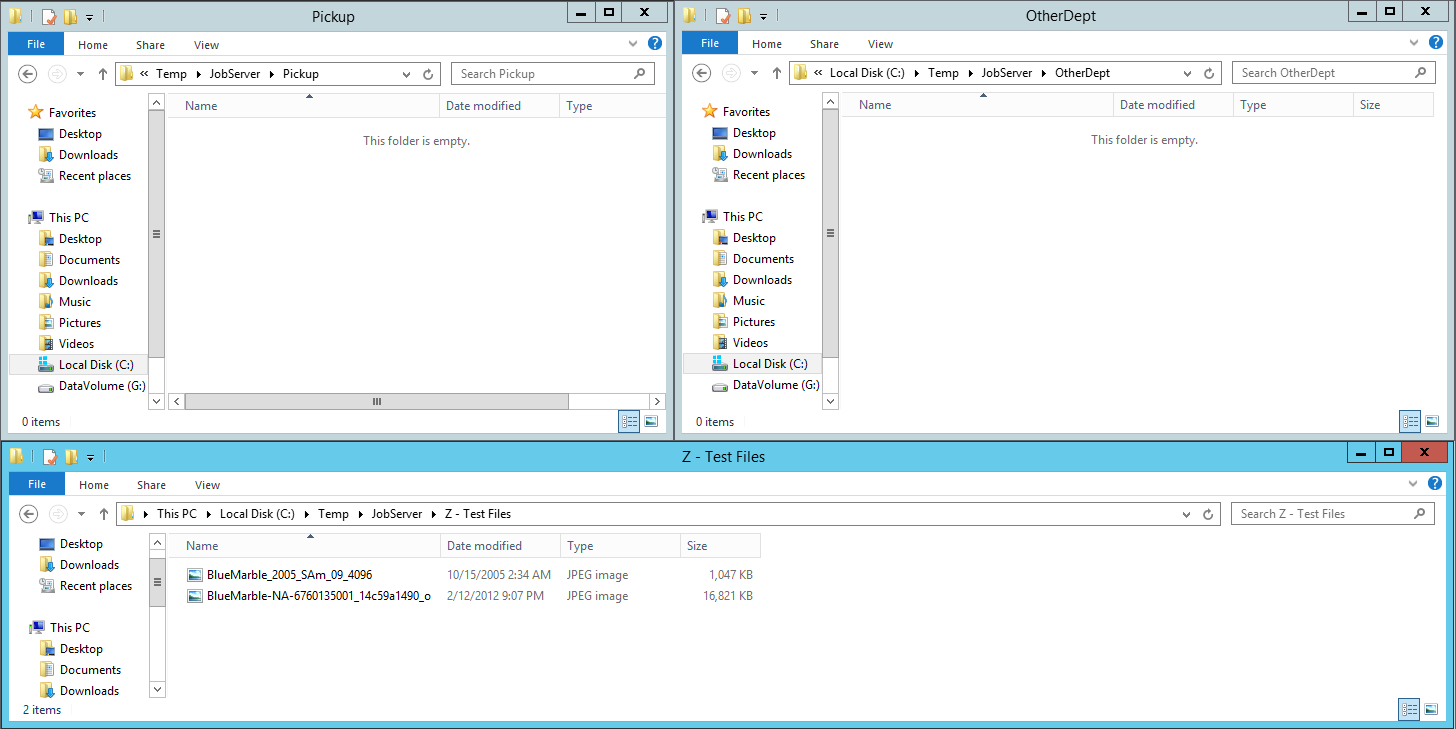
Now with the job defined and enabled, you can test out this event based job definition by putting some files into the folder it is watching, the source folder or Pickup folder as we have named it in the example steps above. Then we watch as the job gets triggered and executes by copying the files we send it to the configured target folder, named OtherDept in the example steps above. This will happen pretty fast, so you will have to pay close attention to see it happen. To try it, we arranged a few file explorer windows to make it easy to view all of them at once. The one on the bottom contains a few example files we are going to drag into the Pickup folder.
To test the newly configured job definition, you want to copy some files into the source folder you configured above. To do this, copy some files from another location and paste them into the “Pickup” folder that you defined as the source folder.

After the job executes, you see the files dropped into the source folder (Pickup) are automatically detected by the JobServer with the FileWatcher trigger and they are copied to the target folder (OtherDept).

Viewing Log History for Jobs
If you have followed through the steps above, you should now have some activity that JobServer.NET has performed recorded in the logs. You can now review this log activity to see what happened when these triggers launched the jobs and see their results. While the Log button on the main toolbar of the manager application allows you to see the entire log at once and filter down to any interesting data, there are other ways to quickly drill down to the relevant data you might want to see.
The best option for reviewing specific jobs is to right-click on the job in the navigation panel and pick the View History option.

Selecting this will open the Job History grid which shows all the times in which he job has been run.

By double-clicking on any of the entries in the job history, you will be taken directly to a filtered list of just the log activity for that specific run of the job. This allows you to quickly drill down on a job’s activity and monitor what the job has done or to research any problems that might be recorded.

Job Definitions
If you followed along the step-by-step in the Getting Started section above, you should now have a basic familiarity with what a job definition is. To recap, a job definition is the combination of trigger and defined steps that are executed when the trigger has detected the date/time or event that it is expecting to see. The definition consists of several default settings which are fine for most job definitions. However, you have control over many settings which allow you to refine the behavior of a running job.
The first of these is the Name field, which should be set to a concise value that tells you what the purpose of the job is. The next field is Group which we will skip over for now as that is explained in the next section. Then we have the Description field. This is completely optional but is very useful when you have numerous jobs or jobs of some complexity, as it gives you a place to document the job in detail. When you have multiple people that may be managing the jobs, this can play a critical role in making sure your other team members understand the nuances of each job.
The Trigger field is a drop-down control which allows you to choose from any of the installed triggers. The first time you pick a trigger when creating a new job definition, or change the trigger, it automatically shows you the configuration options for the chosen trigger. Otherwise, when the trigger has already been chosen, you can update the configuration options of the trigger at any time by clicking the Configure button next to the trigger. Next to configure, the selected trigger will show a text legible description of the trigger’s current configuration.

The Enabled checkbox shows if the job definition is currently disabled or enabled. When the job is disabled, it will not be executed regardless of the trigger. Jobs can also be disabled or enabled using the pop-up menu options in the navigation panel list. The Max Run Time field normally defaults to a value of zero, which means JobServer.NET will allow the job to run for as long as it attempts to. If a specific job needs to be limited to a specific amount of time, this limit can be specified here in the total number of seconds for the running job. If the max run time is exceeded, then the next field Action On Exceeding Run Time will allow you to specify the action that JobServer.NET will take when this happens. The option to Notify DevOps will use the configured Notification Settings to send a message about the job’s condition. The option to Terminate the Job will cause JobServer.NET to force the running job to be stopped. Most jobs should stop safely and will report their status in the log activity.
The next set of fields is named Notify Operator and provides a checkbox option for each of the conditions a job can end with. If you want a notification to be sent on any of these conditions, just check the box or combination of boxes you want to see a notification for. The final set of fields in this area of the job definition show some statistics on the history for this job. For new jobs, most of these will be blank of course. When jobs have run one or more times, you will see the stats will be updated to reflect what has occurred during previous job executions. Note that for jobs that have been in existence for a long time, the Average and Max run time statistics are based on the recorded log activity JobServer.NET has on hand. Depending on the frequency and amount of log activity all the jobs on a machine generate, the logs will automatically be pruned over time. Therefore, these values reflect the statistics for the log data the system has on hand.

The bottom section of the job definition is the Step Editor. Each step consists of one module that may perform one or more actions with the parameters passed into them. Steps are performed in sequence and can be chained together with data or parameter values that pass from one to the next. The toolbar at the top of the step editor allows you to create and modify all the steps. The New and Edit step buttons should be self-explanatory with the caveat that new steps are always added to the bottom of the list. Double-clicking on a step in the grid is the same as clicking edit for that step. Other than the New button, all the other buttons expect to work on a specific step in the grid. Thus, to use any of the others, first make sure your desired step is highlighted in the grid before selecting the button. The Duplicate button will make a new copy of the currently selected step. The Delete button will permanently remove a step from the job definition. Sometimes you might not want a specific step to be executed, but maybe you do not want to delete it, so you can use the Enabled button to either disable or enable a specific step. And finally, the Move Up and Move Down buttons allow you to alter the order of the steps by moving the currently selected step up or down in the list.

While a job definition is being edited, it is locked from modification from any other sources. Therefore, it is recommended to not leave your job definition editor open for longer than needed in order to make any changes to it. This also means that if someone else has the manager application installed and has a job definition open, you cannot edit the same job definition until they either close (and optionally save) the job definition.
Managing Related Jobs Using Groups
The obvious way to manage the job definitions on your server is to give them good and accurate names. Although over time, as you begin to create more jobs and find more ways for JobServer.NET to automate and enable various processes, it may become necessary to take advantage of another way to manage related jobs. You can use the Groups feature to organize all the jobs that have some common element. Groups appear as folders in the navigation panel view in the manager application. To create your first group, right click on the server and select New Group from the pop-up menu. Type in a name for the group and you will see it added to the list under the server.

Once you have created a group, you can now create new job definitions in that group by right-clicking on the folder icon for the group and selecting New Job from the pop-up menu. You can also drag and drop job definitions in the server list to add or remove them from the group. Additionally, now that you have at least one group defined, you will now see that you can also move a job definition you are editing by selecting or changing the group option from the list of available groups.

Group membership does not affect any of the operating conditions or parameters of the job. So, you can add, rename, or delete a group at any time without any effect to the running or pending job. If you attempt to delete a group that has existing job definitions in it, you are given the option to move the definitions out of the group before deleting it, or to delete all the definitions in it along with the group.

Exporting Jobs
A job definition can be exported to an external file. This export option can be used for a variety of purposes. One reason you might want to export a job is to preserve a job definition before making any extensive changes to it. Or, you can export the definition and then copy the exported job definition file (.job) to another server to import, thus replicating the job from one server to another. To export a single job definition, just right-click on the job in the server list and select the Export Job option.

It will default to the same name as the job definition, but you can change it if desired before clicking the save option.

Importing Jobs
Importing a job definition is as simple as exporting. To import a job to the JobServer, right-click on the server if you want to import the job to the general list of job definitions and pick the Import Job option. If you want to import the job to a specific group, then right-click on the group folder before selecting the import option.

The first step in the import process will provide you with a local file dialog to allow you to choose a job definition that you would like to import.

Once you import a job definition, you should open the job definition and make certain there are no detected problems with it. If a problem is detected with a job, you should see any error conditions that need to be resolved with any triggers or modules before the job will be able to become active. Possible problems with an imported job could be that the parameter name for a module has changed or a new required parameter has been added. In cases like this, you would just need to check the list of errors shown and fix the parameter(s) that are showing an error condition. If there is a problem importing the job definition, it will normally be detected immediately and will show one or more error messages from the import process.

In cases when a JobServer is being re-installed on a new server, or existing job definitions are imported from a different JobServer, it is possible that the server where the definition is being imported does not have a module installed that existed on the previous server. Thus when running multiple JobServers, you would want to make sure you have all the same modules installed on any servers you may be importing/exporting the same job definitions to. When an import fails on a JobServer which does not have the module used in the imported job definition, an import error will occur which looks like the following screen. Note how the module name is displayed with a “not found” prefix in the steps.

When such a condition occurs, most likely you need to cancel editing the imported job, and install the missing module(s) before proceeding any further. Otherwise if this is due to an old module that is no longer needed, or has been replaced by one of more newer modules, the job definition will simply need to be edited and updated as appropriate, or removed and replaced with the new modules and parameters. If you edit the step showing a “not found” module, the module field will show the value of “unknown” where the module name would normally be as illustrated in the following example.

Job Triggers
Now that you have walked through the example in the prior sections, a little more formal introduction to job triggers may begin to clarify the various components you have available to you. As you might have already determined, the trigger defines how a given job definition will cause the JobServer to start up and begin executing a new job. A job definition may not even assign a trigger. As we will see later, you may want to be able to define a job that you may choose to run only on a manual basis. By not assigning a trigger, the JobServer will not start this type of job definition unless it is launched manually through the manager application. Otherwise, a job definition will only ever have one trigger defined for it at any one time. We will be reviewing more about triggers and the distinct types of triggers in later sections.
Job Steps
Job Steps are performed in sequence once a new job begins executing. Any one job definition can have nearly any number of steps defined. Each step is used as both a container for and controls settings for Job Modules. The steps and the modules used within each are what perform the actual work of any given job.
Once you begin defining steps for a job, you will have the ability to arrange the sequence in which they are executed as well as the ability to enable/disable specific steps, and duplicate steps when certain ones might be very similar to preceding steps with some configuration changes.
Job Modules
Job Modules are premade components which perform some specific task or function. You can piece these modules together in various ways to complete a more complex overall operation. The modules perform work based on the parameters and other input you may supply them with. These are defined using the steps previously mentioned. In the examples we have seen in prior sections, we have only shown a few modules and basic ways they can be used. We will see more detail about all the included modules in further detail in later sections.
Connections
Up to now, you have seen a few different types of input parameters that the various modules may use. One type of parameter some modules can take is a Connection. These are usually a group of multiple settings which defines how a module might need to communicate with some other device or service. For example, one of the first types of connections we want to look at is the definition for how you can set up the connection that defines how modules can send email messages using an SMTP Connection.
What makes connections so useful is that they are generally used across multiple modules and are securely contained and managed in one place. What make this more important in terms of security is that connections are not stored in JobServer in plain text format. They are encrypted so that only authorized users of JobServer and the job definitions which use them have any access to this more sensitive information. Then if the credentials for a connection change, you can quickly update them in an easy centralized fashion.
To edit your connections, click the Connections button on the right side of the main toolbar in the application manager and it will open the Connections window. Initially the connections window will not list any entries, so you will want to add your first entry by clicking on the New button at the top of the window. This will open the Connection Item Editor and will allow you to create a new connection entry. Start by configuring an email (SMTP) connection that is appropriate for sending email from your network.

Start off by selecting the SMTP option from the Type option list. Give it an appropriate name such as GeneralSMTP and then you can optionally fill in a description for this connection. Finally, you should notice that the Value field has been pre-populated with a text template of values which is valid for the selected connection type. Fill in the values for this SMTP Connection using the following description as a guide.

The settings for the SMTP Connection are described in the following table. These values should be changed to a valid email server for your network.
| Name | Description |
|---|---|
| MailServer | The server name or IP address of the sending email server. |
| Port | The port to use when connecting to the email server. If this setting is not specified, it defaults to port 25 |
| Username | If the email server requires authentication, this should be the username for the account to use. |
| Password | If the email server requires authentication, this should be the password for the account specified. |
| UseEncryption | If the email server supports or requires secure transport using SSL/TLS encryption, this should be set to Yes, otherwise No. |
| FromAddress | The email address an outbound message should be sent on behalf of or appear to come from. |
Global Variables
If you have been going through the various sections of the documentation and following along with some of the examples shown, you should now be familiar with the idea that both triggers and modules can take a variety of input parameters. For those with many job definitions, some that have some type of close or direct relationship to each other, you will find that you may be using the same settings for various parameters repeatedly. If so, this is one of the keys ways you want to take advantage of the Global Variables feature.
The global-variables feature can be managed by clicked on the Globals button you can see right on the main toolbar of the manager application. The first time you open this, you will see an empty looking screen. To try this feature out, click the Add button you see at the top of the globals window. You will now be prompted to create a new global variable. The first step to defining a global variable is to give it a unique name. Enter a name such as MonitorAddress. In the value field, enter one or more email addresses you have access to. If you enter more than one email address, just separate each address with a comma before adding the next in the value field. And finally, we recommend always putting a short description of what this will be used for. In our example we might put the text “All of the email addresses we want to send monitor messages to”. Click the OK button to save this and you should now see it in the list of defined global variables.

Now we can try out using our globally defined value. Previously we created an example job called “Cleanup old temp files”. Locate that job and open its job definition. Once you have done that, we want to add a new step to the job by clicking the New Step button on the toolbar above the steps grid. For the module, pick [Email] Send and set the name to “Send monitor email”. When you get to the list of parameters, notice how there are two small buttons between the parameter name and the control where you can change the parameters value. The first button is the information button. When you click on this, a more detailed description of what that parameter is for is shown. The next button is the assignment button. Clicking on this, you will see the window for selecting a global variable assignment.
To do this, first assign the SMTP Connection to the connection you defined in the previous section. If you followed the steps, it should be named GeneralSMTP. Then go to the To Email parameter, which is the first listed entry for the send email module. Click the assignment button and you will see the list of global variables you have created so far. There will be some other items after your global variables, but we are going to skip over that for now. Find the global variable you named as MonitorAddress and double-click on it to select and assign it. Now you see that the appearance of the value for your first parameter has changed a bit and is showing the value that you entered into the global variable. Next assign your Subject parameter, set it to “Monitoring temp file cleanup”. For your Message parameter, set it to “We just cleaned up the temp files folder.”. The remaining parameters you can leave blank and click the Save button on the step editor.

Now if you have defined all your settings correctly, try running the Cleanup old temp files job manually and when it is finished, it should send you the email message you just defined in the new step you just created.
Job Monitor
The monitor can be used to interactively watch job activity on the server. The monitor displays jobs that are currently running and continues to display recently completed jobs for a few minutes after they finish, for improved legibility. To open the job monitor, just click on the Monitor button on the main toolbar. The monitor window will open, and you will see any jobs that are actively running or recently completed. For a new installation, you will not see much yet, so we will try an exercise to see how the monitor can be used.
Click on the New Job button on the main toolbar and give the new job the name “Sleeper Job”. Jump down to the steps grid and click the New Step button just above the grid. First select the [Shell] Sleep module, then update the name to “Sleep for 30 seconds”, and finally in the parameters list, the Sleep Seconds parameter should be set to a value of 30. When ready, click Save to complete this step returning to the job definition. You may have noticed we did not create a trigger this time and it is set on None. This is fine as we do not want this job to run automatically. We are only ever going to run this job definition manually. Finish this job definition by clicking the Save button and you should be back to the monitor in the manager application.

With the monitor window still open, find the “Sleeper Job” you just created in the navigation panel and right click on it to get the pop-up context menu. Select the Start option on the menu and you should see the job appear in the Running status in the monitor window.

Note while this job is running that the other fields in the monitor grid show the steps and progress of the job. If the job is progressing through multiple steps, you will be able to see which step the job is currently working on. Since this is a simple one step job, we will focus on the Message column. You should notice that the message column is giving us real-time feedback on what is happening within the specific step, or module, that is currently executing. Modules generally are built to try to provide useful feedback on long running processes via this status message, but this can vary for distinct types of modules. With the sleep module we use in the example in this section, you can see it counting down the time remaining.

If by this time the example sleeper job is still running, allow it to finish and you will notice how when the job completes, the status changes to Finished and the job is still temporarily displayed in the monitor. This should allow you to continue viewing the status of recently completed jobs in the case where your job server may have many small jobs starting and completing rapidly. After about ten minutes, the finished jobs should automatically drop off the view from the monitor.

For a next step, start “Sleeper Job”, and while it is still running, click on it in the job monitor window and find the Stop button on the monitor toolbar and click it. You will be asked to confirm if you want to stop the job. Go ahead and stop it and you should notice that this job will be stopped almost immediately, and the status of the job is now changed to Killed. You can use the stop feature to attempt to kill any running job. Just be aware that the server will try to nicely request the job to stop and depending on the step being executed in the job, it should comply and shutdown as nicely as it can. Some modules might not behave as well when being requested to stop while processing, and the outcome of a job that has been killed may result in incomplete data someplace. Thus, be careful when using this feature and when implementing custom modules, and be certain to try to respond to stop requests and leave any data in a known state.

An important consideration when you are using the job monitor is it affects the performance of the manager application. For security purposes, the manager application will normally time out and disconnect from the JobServer when there has been no activity after a prescribed amount of time. If the monitor is left open, then this behavior is affected because the monitor will keep getting updates from the JobServer on its current activity. Therefore, while the monitor is open, the manager application will not time out for the given server. Please keep aware of this and do not leave monitor open on an unattended machine.
Job History and Log
The job server keeps a historic log of all the activity from each running job. We can look at this from a few different points of view. The job history is a view which shows us from the log data, each time a specific job was started. Let us use the example from the previous section and locate “Sleeper Job” and right click on in and select View History from the pop-up menu. When you do this, you will see a nice concise set of information taken from the log which shows all the times it has recorded the job being started. It provides some of the basic overall statistics for the job such as the total elapsed time, the completion status and outcome.

To delve into even more precise data, you can see the full log detail by double-clicking on any one of the run entries in the history grid. That will bring up the full log detail for just this individual run of the job. In the log detail, you will see step by step entries of what happened during the job process from start to finish. Double-clicking on any of the individual log entries will show the log detail record which for any entries that might contain a much lengthier message or set of messages than can be displayed in the grid, will get shown in a full view. It also provides you with a method to copy the log entry information to the clipboard if needed.

This may be the most useful way to look at specific activity that occurred during a known run of a job definition. However, you also can view and search the entire raw log for the entire JobServer. To open the whole server log, just click on the Log button that is found on the main toolbar. This opens the whole log viewer which you can scroll through or use the assorted options to filter out entries to locate specific events that might be occurring across multiple jobs. An example of one thing you might use this for is to click on the dropdown for the Level filter at the top of the log window and select (check) the Error option. Once you do that, you should see a list of all log entries for all runs of every job on the server that might have recorded an error event. By reviewing each one, you can assess if the recorded errors might be due to normal environmental issues that might happen, or if there is some intervention needed to correct an issue somewhere.

The log system in JobServer.NET is self-managing and you do not need to take any specific actions to maintain it. It automatically keeps itself pruned to a reasonable size by purging data older than 90 days (about 3 months) or over one hundred thousand entries.
Managing Multiple Job Servers
The manager application can manage multiple servers at the same time. If you have an additional installation of the server running on another machine, you connect to the other server by clicking on the Connect Server button on the main toolbar. You can open as many server connections as needed. The only limitation is that each job server connection has its own inactivity timeout duration. So, if you open a connection, but do not continue using it in favor of another connection, it will eventually timeout and disconnect.
When you have multiple server connections open, most of the main toolbar buttons perform the desired action on the server within the branch in the connection panel that has a current node selected. As you click on folders or jobs under a specific server, its node in the list remains selected. So for example, when you click the Log button in the main toolbar, you will be looking at the main server log for the branch the selection is currently located in.

Pre-Installed Triggers
This section details the trigger plugins which are included with JobServer.NET when it is initially installed. Additional triggers may become available as downloadable add-ons or added in future updates.
Scheduler Trigger
The scheduler trigger is used when a specific job needs to be started at a particular date and time and may have a variety of conditions to which the job should recur. This recurring pattern can be indefinite or limited to a certain window per period or in total. We will cover a variety of examples in this section due to the flexibility of the JobServer.NET scheduling engine. The first thing to note is that there are multiple types of recurring options that vary based on the type of recurrence it is. You see this reflected in the fact that until you specify a type of recurrence, there are no visible options yet when editing a new trigger. So, we will review each type here.
More Than Once A Day
The more than once a day recurrence type is used when you have a job that needs to run multiple times during a day but can either be every day or only on certain days of the week. We are first going to skip over the first option for Skip Missed Execution Times and come back to that a little later. All the options for this are completely contained by the Start Date and an Ending if one is set. The start date defaults to the current date for a new job definition but can be set into the future if a job should not begin until a later date. The default for an ending date is the Never option, which of course means the job will run indefinitely. The other options allow you to provide a specific date they will run through, as well as an option that allows the job to run only a specific number of iterations. Once an ending is reached, then the job will no longer become active, unless you modify the schedule to change the starting date to be in the future.
The default option for Run Window is All Hours, or in other words the run windows is the entire day. If you want to constrain the job to run only within one, or more time-windows per day, then you can select the Only during selected times option. Once you choose this option, you can define one or more time-windows per day that the job can be active. An example for using this would be if you needed to run a job every hour except during normal office hours. In this case you might define a window from 00:00 to 07:00, and another from 17:00 to 23:59. This would define the time-windows that job can execute, thus excluding the time between these from 07:00 to 17:00 when you might have people in your office. Then you specify the Interval at which you want the schedule to repeat within the defined window(s). For example, to run hourly, set the Hours interval to 1.

Another aspect to defining run windows is that the starting time for each window becomes the anchoring time of day that the next runtime is calculated from. For example, if you wanted a job definition to run every hour, but you only want it to execute at 10 minutes after the hour, then define the time window for your schedule to align to this. For a job that would run all day long at 10 minutes after the hour, just define a time window of 00:10 to 23:59. Then you will have a job that executes at 00:10, 01:10, 02:10, 03:10, and so on up to 23:10.
This concept of the anchoring time applies to the Interval no matter if you set it to whole hours or not. For example, if instead of running hourly, you want the job to execute every 15 minutes, but instead set a time window of 7:10 to 23:59, then you will see job executions occur at 07:10, 07:25, 07:40, 07:55, 08:10, 08:25, and so on. When defining an interval, you can combine the options for Hours, Minutes and Seconds if needed. The JobServer.NET engine will calculate the correct run times to fit within and anchored by the start date and run window(s) you have defined.

The Days option defaults to allowing the job to execute every day of the week. If the job only needs to run on a specific day of the week, then unchecking all the days except the desired day of the week will limit the execution of the job to only those days. You can select any combination of the days of the week and there are shortcut buttons for quickly selecting Every Day, only Weekdays, only Weekends, and deselecting all days.
All these combinations allow for a very flexible way to schedule jobs that occur multiple times through each or certain days. Now that you have seen how these available options can be used together to create a schedule that suits your job, we will go back to that option we jumped over at the start, the Skip Missed Execution Times option. This skip option is enabled by default and for most jobs this is likely going to be the preferred method of working for most jobs. However, there may be an occasion where you may have a complex custom module, or you use the SQL Execute module to run a SQL database procedure that modifies the current state of something, and it depends on running the specific number of times per day that the schedule you have defined is set up for. In cases like this, you can turn off the skip option, and if JobServer.NET detects that a defined job did not execute at a time it should have according to its schedule, this will trigger it to be executed the required number of times to “catch up” to the most current run time.
We can look at an example to see how this works. Let us assume you have defined a job that executes hourly all day long exactly on the hour. This job will execute 24 times every day. And this example job updates internal counters and other statistics that rely on the results of the previous time it was run. Now let us says you must schedule some time to take your machine offline for some needed maintenance, and it winds up being powered off over a little over an hour causing it to miss the scheduled time it would have normally run at. If your machine was offline before 14:00 and through 15:00, the JobServer.NET scheduling engine can detect these missed run times. If the skip option is turned off (unchecked), then the job will be run two times to catch back up to the current schedule as soon as it is able to.
Once A Day
The once-a-day recurrence type is used when you have a job that needs to run only one time per day, either every day or every few days. Thus, you will notice that the number of additional settings that are available under this option are much simpler. Skip Missed Execution Times is the first option as it is with all the scheduler-based triggers. This option works the same way for all types of recurrence and therefore behaves in the same fashion as described in the previous section.
The Start Date and Start Time fields specify the starting date and time as would be expected. Then the next field is the repeating interval option which appears as the Every X Days option. With this set as the default value of 1, the trigger will fire every day at the specified time. When you set this option to a different value, then you want to keep aware of the fact that the starting date and time serves as the anchoring point for when the next run will be triggered.
Finally, the Ending option also is present here as was described in the previous section. This also is true of all the various recurrence types. An example of the once-a-day recurrence type might have us set the Start Time to 07:00 with all the other defaults. This would give us a job that run at 07:00 exactly, every single day.

For another variation, change Start Date to 2021-03-01 and the field Every 1 Days, to a value of Every 3 Days. Now this job will execute at 07:00 on each of the days it should run. But note that with this specified date, the anchoring of the starting date and time means this job will run 2 times on the first week (Monday March 1, and Thursday March 4). Then we will see the job run 3 times the second week (Sunday March 7, Wednesday March 10, and Saturday March 13). And on the third week we see the job run 2 times for this week (Tuesday March 16 and Friday March 19). Then on the fourth week, we see the job will again start on a Monday, March 22. So, in this scenario, the days of the week that the job runs on is based on the anchoring of the Start Date and the number of days it is repeating on.

Weekly
The weekly recurrence type is used when you have a job that needs to run one or more days every week or on an Every X Weeks basis. Or, the weekly recurrence type can also be used when you have a job that needs to run on specific days of the week. As usual, we start with the Skip Missed Execution Times option that was outlined at the start of this section.
Next, we again see the Start Date and Start Time fields to specify the starting date and time. This time we see the repeating interval option appears as Every X Weeks and is based on the number of weeks instead of days as in the once-a-day recurrence. The next field, Days of the Week is what this recurrence type really excels at. Notice how this option has a checkbox for every single day of the week. They normally default to all of them being enabled, but you can toggle any of the off or on in any combination needed. Underneath of them, you see buttons that help quickly set all the days of the week settings to commonly used values, or to quickly select or deselect all the days-of-the-week options.
One example for using this would be to select only the weekdays and use that to trigger the creation of a daily report that goes out to all office workers. Or, select weekends and use that to trigger the creation of weekend promotion emails.

Monthly
The monthly recurrence type is used when you have a job that needs to run once during the month. The options here allow you to have it run on a specific day of the month, or a relative day within the month. Again, we see the Skip Missed Execution Times as has been detailed in the section at the top. We also see the Start Date and Start Time fields which we should now be familiar with as well as the repeating interval option, now appearing as the Every X Months option.
Now the part that makes the Monthly recurrence type distinct: the On field and its options. The first option for it is the day of the month and this is exactly what it sounds like. When you want the job to start on a specific day of the month, you just put that day in this option. So, putting a value of 5 in this option will give us a job that runs on the 5th day of every month. The second option allows you to select a relative day within the month, providing you a way to specify the First Weekday of the month, Fourth Thursday of the month, Last Weekend of the month, or various other such combinations. Finally, we again see the Ending field options.

Yearly
We now reach the last of the recurrence types with the yearly option. This should look familiar as the options are almost identical to the monthly type. The only difference being the option for the relative day is mapped to options within the year, as opposed to within the month as before. So let us look at just that relative day option by changing current option from On Day to On The if not already set. Once you do that you will be able to try the different options within the relative date to see that combinations such as the Second Friday Of June can be selected. Using the combinations of either the specific date or relative day in the year, you would be able to schedule things that might align to certain business processes, such as running a Quarterly Report, or exporting a Year End Inventory Positions file.

CPU Trigger
The CPU trigger can be used when a specific job needs to be executed when the amount of aggregated processor activity on the machine has stayed above or below a determined threshold. We configure this trigger using a few options with the first being the Trigger Threshold. The Trigger Threshold can be set to a value of either Above or Below. As might be expected, if we choose the Above value, then the machine will need to maintain processor utilization above the Threshold Amount. And of course, as you may guess, choosing the Below value would mean that the machine will need to maintain processor utilization below the threshold amount. The Threshold Amount is a percentage of aggregated processor utilization.
The option Seconds Between Checks is a value which controls the overall granularity of how soon the trigger may respond to changes in the processor utilization. The minimum or default value for this setting is 5 seconds. The option Seconds Before Triggering controls the period in which the aggregated processor activity must sustain the level of activity above or below the threshold before the trigger will respond. The requirements for this value will vary significantly based on your intended usage. For example, if your server regularly executes many long running jobs which may be processor intensive, then these may cause the trigger to respond prematurely to what you intend. Thus, successful usage of this trigger may require careful planning and tuning of these values.
Finally, the option for Seconds Between Triggers controls how often the trigger responds to the processor activity. Some jobs you may need to have execute every time your machine utilization is above 95 percent. An example might be if you created a custom module to check for one of your processes that is taking longer than it should and can be detected by high processor utilization. Other times you may need to limit the frequency at which this CPU trigger responds. You can do this by setting this to an appropriately high value. An example might be that you do not want to cause the trigger to respond more than once per hour, so you may set this value to 3600 seconds (or 1 hour).

Available Disk Space Trigger
The disk-space trigger can be used when a specific job needs to be executed when the amount of available disk space on a given drive or volume drops below or goes above a determined threshold. The parameter field Drive/Volume allows the specification of a drive or volume name. For locally attached drives on the machine, this would be done by providing a valid drive specification such as C:\ or any other valid local drives. Keep in mind of course, that these would be referring to drives local to the machine running the JobServer.NET service. If you are running the JobServer.NET Manager application on a desktop machine connected to a remote service, then you are specifying the drives on the remote machine.
For specifying a volume available on the network, you should use the UNC path convention such as \\MyServer\ShareName to specify any path that is available on the network. Be certain that the proper permissions are available for JobServer.NET otherwise it will not be able to get access to the network volume. The next two parameter fields work in tandem to define the threshold. The first is the Threshold Amount and this should be a whole number value. This is used with the Threshold Type field which specifies if the amount is either a percentage of the size of the disk or volume. If percentage is used for type, then the value should be limited to a setting from 1 to 100. Otherwise, it defines the scale of the value allowing you to specify the amount as being a whole number of Kilobytes (KB), Megabytes (MB), Gigabytes (GB), Terabytes (TB), Petabytes (PB).
The next parameter is the Trigger Threshold which allows you to choose between triggering on the amount of free space being Above or Below the threshold value specified. The value specified for Minutes Between Checks allows you to control how frequently the available space is monitored. The value for Minutes Before Triggering controls the period which the available disk space must remain beyond the detected threshold before the trigger starts the job. Let us use an example where you have a disk-space trigger defined on a drive where processes might be creating temporary work files and they normally remove them once completed. If the amount of available space crosses the threshold while the process is running and you do not want the trigger to start before the process cleans up its temporary files, then the minutes before triggering setting should be increased to a value that is higher than the expected runtime of the process. If not, then it is possible that the trigger will start the job due to the existence of the temporary working files. Thus, be aware of such situations otherwise you may see unintended jobs running without an obvious reason as to why afterwards.
The last parameter is the Minutes Between Triggers field. This option allows you to control how often the trigger responds to crossing of the defined threshold. Again, if you have other processes that create large enough temporary working files, this option can help you get the desired behavior from the disk-space trigger. The default behavior is the same as setting this to zero. It will trigger on each threshold crossing. Putting a larger value in here can help you filter how frequently you are running jobs when this threshold is being reached on a regular basis.

File Watcher Trigger
After the scheduler trigger, this is the next most popular trigger: it allows you to set up specific drives, folders, and network paths to be monitored for the existence of new or changed files. This makes it possible to set up a job that responds to files being dropped into a certain location on your network or on a local drive folder.
The first parameter is the Folder Path To Watch. This will be the complete local path like C:\MyFiles, or should be a network UNC path like \\MyServer\ShareName\PathToFiles\PickupFolder. Again, it is important to remember that JobServer.NET must have network permissions to any UNC paths.
The next parameter is the File Pattern. If not specified, it is equivalent to *.*, matching all files in the specified path. The file pattern used here must strictly conform to the simple pattern used in Windows Command Line and such, which only supports the use of the question mark and asterisk for wild card characters (i.e., it is not a regular expression). Therefore, to look only for CSV files in a specified folder, you may use a pattern like *.csv for this parameter.
The Trigger Actions parameter provides some control over the files that are picked up by the file-watcher. For most people, simply clicking the All option is enough and the file-watcher will report back all the files it finds in the path. For a finer degree of control, the additional trigger-actions, Create, Change, Rename and Delete can be used to respond to when those specific events happen to files in the path.
The parameter for Include Subfolders will also search the path for any sub-folders located in it. Normally this defaults to unchecked meaning only the files found directly within that topmost specified folder are found. When the subfolders option is enabled, then any number of subfolders deep will be included while watching for eligible files. The last parameter Include Hidden Files can be enabled (checked) if you want the file-watcher to pick up files that have the hidden attribute set. Normally the file-watcher will ignore any hidden files in the path, but this option allows you to override that behavior.
The trigger also defines an output parameter named FileList. The FileList parameter from this trigger is a list of one or more files that is returned by the file-watcher each time it detects any files matching the input parameters. The list of files is always a fully qualified path to the file and multiple files are formatted as one entry per line.

While the screenshot of the above shows the example in the preceding steps, this is what a local file path might look like when configuring a new file watcher trigger.

Ping Trigger
The ping trigger can be used to start a job if a device stops responding to ICMP Ping requests. The first parameter this takes is the Host Name/Address. This should be the fully qualified domain name of the device, or the IP address of the device. The next parameter is Timeout Seconds Per Ping, which defaults to 20 seconds if you do not specify one. This controls how long we should wait until before recognizing an individual ping request as a failure. The parameter Seconds Between Pings defaults to a value of 60 seconds. This controls how frequently individual ping requests are sent to the specified device. And finally, the Minutes Between Triggers parameter will throttle how often this may be re-triggered if the device continues being non-responsive. This defaults to 5 minutes but can be set all the way down to 0 if you wish it to retrigger the job over and over while the device is non-responsive.
 response")
RAM Trigger
The RAM trigger can be used to start a job if available system memory either drops below a threshold or rises above a threshold. The first parameter, Threshold Amount must be specified as a whole number value. This is used with the Threshold Type field which can specify if the amount is a percentage of total system memory. If percentage is used for type, then the value should be limited to a setting from 1 to 100. Otherwise, it defines the scale of the value allowing you specify the amount as being a whole number of Kilobytes (KB), Megabytes (MB), Gigabytes (GB), Terabytes (TB), Petabytes (PB). The Trigger Threshold parameter defines if we are looking to trigger based on the amount of free memory dropping below the threshold or rising above the threshold.
The option Seconds Between Checks is a value which controls the overall granularity of how soon the trigger may respond to changes in the amount of free memory. The minimum or default value for this setting is 5 seconds. The option Seconds Before Triggering controls the period in which the amount of free memory must sustain either above or below the threshold before the trigger will respond. The parameter for Seconds Between Triggers controls how often the trigger responds to the amount of free memory remaining above or below the threshold.

Here we can see the difference between selecting the trigger to be based on a specified value for the threshold, versus when it is based on a percentage.

WMI Trigger
The WMI trigger can be used to start a job based on the results of the WMI Query. The WMI Query should return a single result and provides options for testing the value of the result either as a string value or as a numeric value. The first parameter WQL Query Scope should be set to the desired scope to execute the WQL query in. If unspecified, this defaults to the value of root\CIMV2 by default. The next parameter WQL Query is exactly as it sounds, the actual WQL query we want to execute for the trigger. The Query Data Type Returned parameter is used to define if we are going to treat the returned value as a plain string, or if we are going to treat it as a numeric value.
The Comparison Operator parameter is the reason why we want to define if we are treating the return value as either a string or as a numeric. Since some of the options for comparison can check for scale, this affects the result of the compare test. A numeric comparison of the number 2 would be less than the number 101. But if they are treated as string values and compared alphanumerically, the result is the opposite of what the numeric test is. Thus, you want to make sure you are using the expected type. The comparison operators can be Equals, DoesNotEqual, IsGreaterThan, IsLessThan, IsGreaterThanOrEqualTo, IsLessThanOrEqualTo. Any of these comparisons can be checked against the parameter Value To Compare Against to cause the trigger to execute the job.
The option Seconds Between Checks is a value which controls the overall granularity of how soon the trigger may respond to changes in the value of the WMI query result. The minimum or default value for this setting is 5 seconds. The option Seconds Before Triggering controls the period in which the value must continue to pass the comparison test before the trigger will respond. The parameter for Seconds Between Triggers controls how often a re-trigger of the job may occur if the value continues to pass the comparison test.

JobServer.NET Installed Modules
This section details the module plugins which are included with JobServer.NET when it is initially installed. Watch for additional downloadable modules which can be installed optionally. Before reviewing the individual modules, note the commonly used conventions in the installed modules. The modules that take a list of one or more files as one of the main input parameters for some process will usually use the name FileSource for this purpose. And any module that outputs a list of one or more files that would be directly compatible with using as the input to these will usually use the name FileList as the output for these parameters. We will refer to both in general terms as a FileList and we will see why this sometimes has more significance to it later. For now, it is sufficient to just say that this is just a list of files that we either provide as an input parameter to a module or generate as a list of files found or processed as an output parameter from a module. The most common example of the second is using the [Files] Find module to pick a selection of files and then passing that onto another module as the list of files for it to process. For modules with a FileSource input parameter, generally if you do not need to use the more powerful options the [Files] Find module provides, then you can just supply the folder with a filename pattern on the end of the path. An example would be specifying a folder path and filename pattern like C:\Temp\*.log for FileSource.
[ActiveDirectory] Find Users
This module is used to look up a list of one or more user accounts in Active Directory. The module needs an Active Directory connection, then the other remaining optional parameters can be combined in various ways to select the Active Directory user accounts of interest.
[Email] Send Message
This module is used to send an email message to one or more recipients. It requires the connection information for an SMTP server that will accept the email messages for forwarding, or delivery if the messages are all going to local recipients.
| Parameter | I/O | Description |
|---|---|---|
| SMTPConnection | In | This should specify an SMTP connection. |
| To | In | This should specify one or more destination email addresses. Multiple email addresses should be separated by comma. See paragraph below on email address formatting. |
| From | In | This can be left empty as long as the connection being used specifies a From address. Otherwise, this can over-ride the From address in a connection and specifies the email address the message should appear to come from. For automated messages, typical convention might be to use an address like noreply@example.com. |
| Subject | In | The subject line of the email message. |
| Message | In | The body text of the email message. The body text can contain basic HTML for formatting. |
| FileSource | In | An option FileList of files to include as attachments to the email message. |
| Priority | In | What priority level the message should be sent as. Valid values are Low, Normal, or High. The default is Normal. |
| LogOutputLevel | In | Minimal: Normal output to the log. Verbose: More detailed output is written to the log, suitable for debugging purposes. |
Email address formatting uses either the plain inbox-host format, or must be in fully quoted displayname format. The plain inbox-host format, {inbox}@{hostname}, is typically what you may always be used to seeing when you type in an email address. An example could be aaron88@example.com. The fully quoted displayname format supports a much friendlier display option on the recipients end when you have their full name along with the email address. These are properly formatted as "Lastname, Firstname <inbox@hostname>". So a corresponding email formatted this way would need to look like "Abernathy, Aaron <aaron88@example.com>".
[Excel] Template Merge
For each source file provided, the module creates a new Excel file in the specified destination folder by copying cell values from the source worksheet into a designated area of the template worksheet. The resulting output files retain the template’s styling and structure while incorporating the source data.
[Facebook] Post Message
This module is used to post a message to a Facebook account wall, or optionally, in a specified group if the account is a member of the group.
[Files] Are Identical
This module is used to check if a file is identical, or not, to another referenced file. It compares the file contents to each other.
[Files] Checksum
This module is used to generate a checksum value for one or more files. This is useful for comparing files to each other, or to a known value, to determine if the file is the same as another file or not. The module supports the following algorithms for generating the checksum value: MD5, SHA256, and SHA512.
[Files] Compress
This module compresses one or more files, either to a specified destination folder, or in-place. In regular usage, the files are compressed as they are copied or moved to their destination with each file that is being compressed having the same root filename as the original source file. Note that the file extension will be changed to denote the file as being compressed. Thus, a file that came from the source list of files with the filename “Chain Quarterly Inventory Results 2012.xlsx” will become “Chain Quarterly Inventory Results 2012.xlsx.zip”. Each compressed file in the destination has the same base source filename as the original file did.
Additionally there is an optional grouping set of options which changes the behavior of the specified destination. When the grouping options are used, the destination filename may not be a 1:1 relationship to the source files. The destination file may contain multiple files from the source based on the selected grouping options. The grouping option allows the source files to be compressed together into a single .zip file on each execution. The grouping options are based on a time period setting which controls how the destination filename is generated. This option is combined with the file prefix option and the date/time the module is executed to determine the actual name of the destination file.
The table below illustrates how the combinations can be used together when the input files are these three files:
- Daily Sales 1.xlsx
- Daily Sales 2.xlsx
- Daily Sales 3.xlsx
For illustrative purposes below we are assuming the module executed on 2012-02-03 at exactly 23:00:00, and this is reflected in the date and time based values in the destination filenames for all options except the None option:
| Grouping | File Prefix | Destination Filename(s) |
|---|---|---|
None |
(none) Hello |
Daily Sales 1.xlsx.zip Daily Sales 2.xlsx.zip Daily Sales 3.xlsx.zip Hello_Daily Sales 1.xlsx.zip Hello_Daily Sales 2.xlsx.zip Hello_Daily Sales 3.xlsx.zip |
Timestamp |
(none) Hello |
2012-02-03_23-00-00.zip Hello_2012-02-03_23-00-00.zip |
Hour |
(none) Hello |
2012-02-03_23.zip Hello_2012-02-03_23.zip |
Day |
(none) Hello |
2012-02-03.zip Hello_2012-02-03.zip |
Week |
(none) Hello |
2012-02-W05.zip Hello_2012-02-W05.zip |
Month |
(none) Hello |
2012-02.zip Hello_2012-02.zip |
Quarter |
(none) Hello |
2012-Q1.zip Hello_2012-Q1.zip |
Year |
(none) Hello |
2012.zip Hello_2012.zip |
As we can see from the examples in the list, when no grouping option is selected, the files will keep their original base filename. A file prefix can be specified for the None option and doing that will add the prefix to the original filenames. That option may not seem so useful for the None option, but that changes when combined with any of the other grouping options.
Except for the None option, when the destination filename is based on the selected grouping option, the generated filename for the destination is likely to use the same destination filenames when the module is executed multiple times within the time period that corresponds to the named grouping option. Or, in other words, if you selected the Month option for grouping, every time you execute the module within the same month, it will use the same destination filename. This is beneficial in that new input files on the subsequent executions will be continually added to the compressed file. So, in the scenario using the Month option, all files for the same month will be added to the destination compressed file for that entire month.
Again, keep in mind that all the grouping options besides None, and the values for determining the output filenames, are based on the date and time of the module being executed. It is not based on the source files filenames. This behavior only has a superficial appearance as being different when grouping is not used, when the original source files have dates and/or times in their filenames.
The parameters that the module uses are detailed in the following table.
| Parameter | I/O | Description |
|---|---|---|
| FileSource | In | This is a list of paths to existing files for the module to process. There should be one or more entries for the module to process. |
| Action | In | Copy: Copies the source files to the destination. Move: Copies the source files to the destination and then deletes from the source folder the files that were copied. |
| DestinationFolder | In | This should be a full path to the folder where you want your compressed output files to be written to. A path can be specified as a local path, or as a UNC path. Examples: D:\Sales\DailyDetailArchive \ServerName\ShareName\Sales\DailyDetailArchive |
| CompressionGrouping | In | None: Creates one destination zip file for each source file, with the same name as the source file, plus a “.zip” extension. Timestamp: Compresses all files to a single file named Hour: Compresses all files to a single file named Day: Compresses all files to a single file named Week: Compresses all files to a single file named Month: Compresses all files to a single file named Quarter: Compresses all files to a single file named Year: Compresses all files to a single file named See the table in the section above for more details. |
| FilePrefix | In | This string, plus an underscore ("_") character is added to the start of the destination filename when specified. Applies to all CompressionGrouping settings above. |
| LogOutputLevel | In | Minimal: Normal output to the log. Verbose: More detailed output is written to the log, suitable for debugging purposes. |
| FileList | Out | On a successful outcome, this will be a list of the files written to the compressed file(s). |
[Files] Contains
This module is used to get a list of available files from a specified location that meet specified search criteria.
[Files] Copy/Move
This module copies or moves files from one location to another. Typically, you would first set up a job step that uses the [Files] Find module, then use its output as the input to this module. You can also forgo this and supply a file or folder name in FileSource.
[Files] Decode Base64
This module is used to decode a file that is encoded in Base64 format. A file encoded in Base64 is typically used to encode a binary file or object for transmission through a system that normally only properly handles text values. A commonly found example is its use in legacy SMTP email systems.
To use, pass in a list of one or more files that need to be Base64 decoded. The files are created in the output folder, fully decoded and ready for use in any next steps on your job.
[Files] Decompress
This module can be used to decompress one or more files that are stored in a .ZIP compressed file format. The compressed files are extracted and written out to the specified destination folder.
[Files] Delete
This module allows you to delete the files that are specified. This is a common baseline file handling feature and works exactly as you would guess. While you can use it to delete a specific file, or group of files matching a pattern, it becomes more flexible when you combine it with other modules such as the [Files] Find module that is outlined below.
[Files] Delimiter Convert
This module is used with text-based data files that are usually provided by legacy systems, external sources and other places where the choice of output file formats are fairly restricted. The text file may contain data with any number of output records. Each field within each record may use a type of delimiter that is not convenient for use on your target process. This module provides a way to easily automate that type of change. For example, the output of a legacy system only uses TAB characters in the output data/text file it creates, and you wish to use the file in a system that only accepts Comma Separated Values. The module allows a convenient way of transforming this into the proper format.
The module can convert your data/text files using Commas, Tab Separated Values, or Pipe characters as field delimiters.
[Files] Download Zone Info
This module allows you to manage the download zone information flag for your files that are stored on any filesystem that supports it. The download zone information flag is stored within an alternate file stream attached to the file, which is only supported on filesystems like NTFS. Filesystems like FAT32 and other old or legacy filesystem do not support features like alternate file streams.
The download zone information flag can be a help or a hindrance to end users depending on your specific usage needs. This module assists you in managing that either way. When files are downloaded through users’ browsers from untrusted networks, the download zone will be set to indicate it may be from an untrustworthy source. In such cases, when end users attempt to do certain things with the file, they will be prompted with a warning that the file can be dangerous. Sometimes you may want this behavior, and other times may be an unnecessary hindrance, such as when you are downloading files from a trusted vendor.
The module allows you to remove the flag from any one or more files, or set it to a certain level if needed.
[Files] Encode Base64
This module is used to encode a file, typically a binary file, and modify its contents so that it is now encoded in Base64 format. A file encoded in Base64 is typically used to encode a binary file or object for transmission through a system that normally only properly handles text values. A commonly found example is its use in SMTP email systems.
To use, pass in a list of one or more files that need to be Base64 encoded. The files are created in the output folder, fully encoded and ready for use in any next steps on your job.
[Files] Find
This module allows you to locate a selection of various files that you want to process further in a following step or module. The module provides a variety of options to gather up a list of files from a specified location and allows the combination of options to allow for some extraordinarily rich filtering of what files you want it to identify. We will first start by just outlining the parameters the module uses in the following table.
| Parameter | I/O | Description |
|---|---|---|
| FileSource | In | This should be the base folder (path) that you want to have the find module begin looking for eligible files. Note: while most other built-in modules support a filename pattern at the end of the folder path for this same named parameter, this is not supported in this module. The pattern feature is significantly more enhanced in this module and it is specified as a separate parameter. |
| FilenamePattern | In | This is a simple filename pattern that can be used like in many legacy applications using the asterisk * and question mark ? characters as wildcards for simple pattern matching. These simple patterns can be combined by using the vertical bar separator ` |
| IncludeRegEx | In | This allows specifying a regular expression to find files from the source path. The matching is done by file name only, not on the entire path. Using a regular expression allows for complex selection of filename rules. Since regular expressions can be involved, we will provide more details and examples in the section below. |
| ExcludeRegEx | In | This allows specifying a regular expression to filter out any files from the source path that we do not want. The matching is done by file name only, not on the entire path. Since this uses a regular expression, it can be combined with both the filename pattern and include regex options to provide a rich set of rules for processing specifically named files in a source path. |
| IncludeSubfolders | In | True: The find operation will dig down into any sub-folders located in the source path and will include any files matched in the sub-folders. The sub-folders option is recursive and will keep looking for files any number of subfolders deep. False (default): The find operation is only going to look for files located directly within the source path. |
| AgeType | In | Newer: Match only files newer than the thresholds specified below. Older: Match only files older than the thresholds specified below. None (default): The threshold options below have no effect on the matching files found. |
| ThresholdValue | In | An integer value for the age threshold. This is combined with the next option to tell us what the threshold is. So, we are able to input a value of 3 here and then choosing the next option is what differentiates the threshold from being set to 3 days or 3 weeks. |
| ThresholdDuration | In | Minutes, Hours, Days, Weeks, Months Combining this with ThresholdValue above allows for selecting a wide range of aging options for file selection. Defaults to Minutes. |
| NoFilesFoundOutcome | In | ContinueJob (default): If no files are found, continue to the next step of the job.StopJobWithSuccess: If no files are found, stop the job with a success status.StopJobWithFailure: If no files are found, stop the job with a failure status to indicate that this might not be intended results. |
| LogOutputLevel | In | Minimal: Normal output to the log. Verbose: More detailed output is written to the log, suitable for debugging purposes. |
| FileList | Out | This parameter lists all the files from the Find operation that the module was able to identify. |
For most situations where you may just have a single folder where you pick up files for some process, you will often just be limiting yourself to just specifying the FileSource folder location and that might be it. At a minimum, you should consider specifying a filename pattern for all entries and limiting it to the specific type of file(s) you expect to see. For example, if you have a folder location where some other process always drops .log files that you are going to do something with and never expect to see any other types of files, you should really always use a *.log pattern as opposed to specifying a *.* pattern explicitly or not supplying a pattern at all.
Almost all Windows applications support this same filename pattern in various ways, but many times you are limited to only a single filename pattern. The filename pattern in this module allows you to specify nearly any number of filename patterns you want by simply separating each with the vertical bar (|), also referred to as the pipe character. So if you have a process that is going to read a variety of image files, and you can support multiple different formats, you might use a filename pattern like the following example. Notice how this allows you to handle files where sometimes some people or applications are in the habit of creating JPEG image files with either the .jpg or the .jpeg filename extension.
*.jpg|*.jpeg|*.gif|*.png|*.bmp
The IncludeRegEx option works like a filter as well and can be combined with whatever options you might have in the filename pattern. This helps in the example used in the filename pattern as you only have to build the regular expression to match on the filename portion and do not have to build out the final part of your regular expression to limit based on all the supported image filename extensions. It will match against just the filename portion of the file (it does not compare against the full source path or any optional sub-folders the file might be found in). Continuing with the example we started with above, we want to make sure our image files have what looks like a valid date in the format of YYYYMMDD as any part of the filename. We can do that with an expression like the following example.
^.*\d\d\d\d(0[1-9]|1[0-2])(0[1-9]|[12][0-9]|3[01]).*\..+$
The ExcludeRegEx option continues to filter this set of files and when this is used, it will exclude any files with the filename that match this regular expression. Because this can be used to filter out certain types of exclusions, it can help to keep your IncludeRegEx much shorter and easier to read without resorting to overly complex expressions. So again, we will continue with the example started above and we want to make sure we do not have any files which might have the text “_OLD” as the end part of the filename.
^.*_OLD\..+$
By combining these various parameters together, we wind up with a comprehensive set of rules that define what filenames we want to recognize in the source folder, while keeping the set of regular expressions we use to accomplish that to a more simplified and easier to read format. For a more visual introduction on how to utilize the combinations of filename patterns and the include/exclude regular expressions, check out the article at the following URL for additional examples and more.
https://kb.jobserver.net/Q100032
The option to include subfolders is used when you want all the files in the specified path, and all the files located in any of the subfolders that fall underneath of that top level path. This option is recursive and will retrieve all the files located in the folder structure anywhere under the top-level path. When the FileList output for the [Files] Find module is connected to any other module that which can work with relative paths, the relative path information is included in the FileList output and allows such modules to offer enhanced functionality. For example, if the subfolders are populated with files, and you use it in conjunction with the [Files] Copy/Move module, one of the options in that module is to replicate subfolders on the destination. It is this enhanced meta-data that is encoded in the FileList output which allows this feature to work with the original relative hierarchy of files found in the source, when it is desired. Otherwise for all other modules which do not recognize the hierarchy data that [Files] Find can provide, they will just treat the list of files the same as a list from one source folder, ignoring the hierarchy information. This will be covered in more detail in the Copy/Move modules.
The next three parameters work together as a single set of options for the functionality we’re about to review. Under normal circumstances, if these parameters are left at their default values, the files returned from the find operation will include all files that match the previously defined filtering options. By default, file timestamps are not considered. These three parameters introduce an additional and very useful capability: filtering files based on age relative to the current execution time. This allows you to process only files that are either older or newer than a specified time range. The first parameter, AgeType, defaults to None. When set to None, age-based filtering is disabled, and the other two parameters—ThresholdValue and ThresholdDuration—have no effect. If AgeType is set to either Newer or Older, age-based filtering is enabled. In that case, ThresholdValue and ThresholdDuration define the time window used to determine which files are included in the results.
When the AgeType setting is changed to Newer or Older, we can now easily specify a timeframe for files that have been modified and we can narrow our focus to just those files. We can specify this timeframe all the way down to a period of minutes, up to a period of months. Of course, you can specify years, but you are just going to have to do a tiny bit of math to enter 36 Months if you want to specify three years. You could specify a timeframe of only files older than 90 days by setting the three parameters to AgeType: Older; ThresholdValue: 90; ThresholdDuration: Days. You might connect a [Files] Delete module to this to clean up a folder of old files you may be using in some other process. Going the other direction, you could specify a timeframe of only files newer than 60 minutes by setting the three parameters to AgeType: Newer; ThresholdValue: 60; ThresholdDuration: Minutes. You might connect this to a process that only runs once an hour for importing data files and need to evaluate only the most recently updated file(s).
The parameter NoFilesFoundOutcome provides a way to override some of the default behavior of the module. The default value for this parameter is ContinueJob and we will see how the other options are different from this in just a moment. Normally, once all your filtering options are combined and the module finds all the matching files, it emits them through the FileList output parameter. It does this if it finds a few files, thousands of files, or no files at all. This means that when no files are found matching your specifications, that result will still be passed onto the next step or module in your job. Normally, this should be fine for most modules, as a well written module should handle an empty input list properly. But there can be times when either a specific module does not handle a list of no files as input, or it just makes sense that if [Files] Find did not actively find any files matching your search request, then maybe the job should stop at this point. It is this last condition that this option becomes particularly useful.
By changing this parameter to either StopJobWithSuccess or StopJobWithFailure, the module will stop the job execution from proceeding any further in the event the find operation would return no matching files. The only difference between these options is if it causes the step to be flagged as completing successfully or not. If the fact that the find operation found no files and there is no further work to do in the job, then stopping it with a success status would make sense as this would be no cause for concern, and it is safe to stop any further processing here. Otherwise, if a particular job always expects to find one or more files when it is run, and the fact that no files were found on a given run might indicate some sort of problem, then setting it to the failure option would allow it to stand out in your log and gives you the ability to trigger DevOps notifications in the job definition if desired.
The parameter LogOutputLevel controls the amount of detail that is included in the log activity when the job is executed. For [Files] Find, there is not normally a reason you might need to set a higher level of logging detail. The exception for this might be if you are setting up a non-trivial combination of options and want more information about what it is using and the results it generates recorded in the log, then setting this to the higher verbose option can be useful.
[Files] Find And Replace
The [Files] Find and Replace module provides a method for applying content changes to text/data files. This can be used to manipulate or fix data in plain text files, such as replacing all occurrences of “flat-white paint” with “White Paint, Matte Finish”.
[Files] Generate Filename
This module is used to generate a new, unique filename based on the supplied parameters.
[Files] Join
The [Files] Join module provides a method for joining multiple input files into a singular text/data file. Various options provide for joining files under a variety of conditions.
[Files] Mutex Lock
The [Files] Mutex Lock module allows for jobs which may interact with each other when running to take an action based on lock activity. This can be used to prevent two jobs from running at the same time which might try to use the same resource. When used in this manner, the job that received the lock first, will be able to continue running, while the job that encounters an existing lock will be stopped. Another form of operation would be to allow the lock to act as a gatekeeper, only pausing any subsequent jobs and only allowing them to continue on once the previous lock is cleared.
This allows for multiple jobs which may need access to a limited resource, or when a process would not work correctly if multiple jobs were attempting to work with a given resource at the same time.
[Files] Mutex Unlock
The [Files] Mutex Unlock module allows for jobs which may interact with each other when running to take an action based on lock activity. This is used in conjunction with the Mutex Lock module. They are used together to wrap around a critical section of job steps. See the Mutex Lock KB article for a complete description and examples.
[Files] Pick Subset
The [Files] Pick Subset module picks a subset of files from the supplied FileSource, up to the specified number of files, and returns their names in an output list parameter.
[Files] Read
The [Files] Read module provides a means to read the text contents of a file and make it available as an output parameter for use by subsequent steps in a job. Thus, it takes only a single input parameter as the source filename to read. The contents of the file are made available on the TextValue output parameter.
[Files] Render FileList as Html
This module takes a list of files and renders it as an HTML table.
[Files] Set Attributes
The [Files] Set Attributes module allows you to operate on one or more specified files and set the filesystem attributes for all of the indicated files.
[Files] Split
The [Files] Split module allows you to take one or more large files, and split them into individual smaller sized files. Splitting large files like this is typically used when it is necessary to transmit or store the files on different media or filesystems that might not properly handle the original large size files. The files can be joined back together when needed after transmission or when recovered.
For example, suppose you have a 100 MB file and you want to split it into 5 MB chunks for storage/transmission. Your original input file might be named ThisSeasonsData.dat and with specifying 5 MB for the SplitAtSize parameter, you should end up with 20 output files, sequentially named from ThisSeasonsData_0001.dat through to ThisSeasonsData_0020.dat.
[Files] Text Convert
The [Files] Text Convert module provides a variety of options that allow for quick and simple cleanup of text based data files you might have received or generated from one system that needs to have some minor manipulation occur on the file before it can be used or consumed by another system. This module offers several common options for cleaning up text-based data files of this type.
[Files] Touch
The [Files] Touch module provides a way for the supplied list of files to have the file date and time timestamp updated for the file(s) along with setting or clearing one or more other flags on the file(s).
[Files] Validate Checksum
This module validates a list of file(s) against a checksum manifest file. The manifest file is in either CSV, JSON, or SUM format. The supported checksum types are MD5, SHA256, and SHA512. The module will return a list of files and pass/fail status.
[Files] Write
The [Files] Write module implements a method for taking an output parameter from another module and writing the contents to a specified text file.
[Folders] Check Size
The [Folders] Check Size module provides a way to look at a folder based on the number of files in it, or the size of all the files in it, and the option of those values being applicable to only the top level folder, or include the hierarchy of any nested subfolders.
[Folders] Create
This module creates 1 or more folders in a specified root path. It returns a list of folders that were created.
[Folders] Delete
This module deletes 1 or more folders in a specified root path. It returns a list of folders that were deleted.
[FTP] Copy/Move from Remote
This module allows you to copy or move one or more files from an FTP server to a different location, e.g., on a local or network drive. Typically, you would first set up a job step that uses the [FTP] Find on Remote module, then use its output as the input to this module. You can also forgo this and supply a file or folder name in FileSource.
The module will connect to an FTP server, copy each specified file to the desired destination, and then optionally delete it from the FTP server once it has been successfully copied.
[FTP] Copy/Move to Remote
This module provides a way to copy or move one or more files from a local or network drive and upload them to an FTP server. Typically, you would first set up a job step that uses the [Files] Find module, then use its output as the input to this module.
The module will connect to an FTP server, copy each specified file to the desired destination, and then optionally delete it from the local source once it has been successfully copied.
[FTP] Delete from Remote
This module allows you to delete files on a remote FTP server. You can specify a specific file or an FTP FileList, which is typically done using the [FTP] Find on Remote module.
[FTP] Find on Remote
This module allows you to locate a selection of various files on an FTP server that you want to process further in a following step or module. Like the [Files] Find used for selecting files on local drives or network connections, this module provides a variety of options to gather up a list of files—in this case from an FTP server; and allows a combination of options to allow for filtering of what files you want it to identify.
[Hyper-V] Action
The [Hyper-V] Action module allows you to use a job to control a Hyper-V virtual machine. It allows you to start and stop VMs, along with a few other operations.
[Hyper-V] Checkpoint
The [Hyper-V] Checkpoint module allows you to manage checkpoints on a Hyper-V virtual machine.
[IIS] Action
The [IIS] Action module provides a means to use a job to control an IIS server. It allows you to start and stop websites on the server, along with a few other operations.
[Images] Constrain
The [Images] Constrain module provides you with a flexible means to size images to a consistent state. It constrains the image to the specified settings with the goal of not distorting the image due to mismatches in the aspect ratio in the source image and desired target image.
The parameters that the module uses are detailed in the following table.
| Parameter | I/O | Description |
|---|---|---|
| FileSource | In | This parameter specifies the source of the image files as a FileList type of parameter. As a FileList, this can be specified as just the path for a specific folder. Or it can be specified as the path to a folder with a filename pattern to limit it to specific types of filenames or extensions. Or it can be linked to a preceding [Files] Find module for more flexibility in choosing what files to process. |
| TargetFolder | In | By default, re-encoded images are written to the target folder without affecting the original source image. This means the target folder must be a unique location from the source folder. |
| DeleteSourceFiles | In | The default value for this parameter is false (unchecked) meaning the original source image is not affected by the re-encoding process. If changed to true (checked), then the source image is deleted only once the modified file is successfully written to the target folder. |
| Operation | In | Crop (default): Determines the best way to obtain a usable image from the source image by cropping it to fit the target size while maintaining the targeted aspect ratio. Scale: Maximizes the original image inside the target size, maintaining the aspect ratio. If the source image and the target size are not an exact match to the aspect ratio, then the canvas color will be visible as either horizontal or vertical bars as needed. |
| Width | In | Either the target height or width of the output image should be specified. If only one is specified, then the aspect ratio of the target must be specified. If both are specified, then the target aspect ratio does not need to be as supplying both the width and height define the new aspect ratio. |
| Height | In | Optional sometimes as explained in the description for the Width parameter above. |
| AspectRatio | In | If only a target width or height (but not both) are specified, then the target aspect ratio must also be specified. Aspect ratio is supplied as a string value such as “16:9” which is the standard aspect ratio for 1080p HDTV resolution. An aspect ratio of “4:3” would match the aspect ratio of the older SDTV resolution. |
| SourceAnchor | In | None, Top, TopLeft, TopRight, Bottom, BottomLeft, BottomRight, Left, RightWhen determining how to best fit the source image into the target image, the default is None, which centers the source image both vertically and horizontally either within or over the canvas for the target image. This behavior can be modified by having the source image optionally anchor itself to one or two sides of the target. An example might be if all the source images you are processing are photos of people’s faces and the top of their head is generally near the top of the photo, then you might change the anchor to Top to make sure it does not crop out the subject’s hair. |
| CanvasColor | In | On scale operations when the canvas of the target image may wind up being slightly larger than the source image which would result in an uncovered portion of the canvas. In such a condition, you may want to set the canvas color to match your usage. Colors can be specified in the HEX-RGB format such as “#808080”, or any of the standardized names recognized by the .NET System.Drawing.Color namespace. |
| AutoRotateOnExif | In | True (default): The image will automatically be rotated to the correct orientation if there is embedded EXIF sensor data that would indicate the image is not stored oriented to the expected viewing angle. False: The EXIF data is ignored, and no rotation will occur regardless of any EXIF data embedded in the image. |
| LogOutputLevel | In | Minimal: Normal output to the log. Verbose: More detailed output is written to the log, suitable for debugging purposes. |
| FileList | Out | When the module completes any work successfully, this is a FileList of all the specific images that were re-encoded and written to the target folder. |
Let’s review how the crop and scale operations work. When the system prepares the target image, it first creates a blank canvas sized according to your specifications. At this point, no source image has been applied—just the empty canvas. The crop operation trims the source image as little as possible so that it completely covers the canvas. In other words, it ensures there are no empty areas, even if that means cutting off some of the image. The scale operation works differently. It resizes the source image so that the entire image remains visible while fitting inside the canvas as closely as possible. This guarantees nothing is cut off, though there may be empty space around the image if the aspect ratios differ.
The crop operation is the method you would want to use if you are certain that the content of your image is either usually centered, or closest to one edge or corner of the source images. This allows you to get the maximum amount of the original image into your target image and will completely cover the canvas of the target image. Using crop allows you to wind up with a target image that is consistent in size and does not have any bleed through of the canvas on the target image.
((TODO: add example constrained:crop images))
The scale operation is the method you would want to use if you are either uncertain that the content of your image is going to be mostly centered or in a predictable relative position of the source image. This preserves your entire source image at the expense of having the canvas of the target image visible on one or two edges of the target image.
((TODO: add example constrained:scale images))
For more examples on the constrain module and the differences between the crop and scale operations, you can review the article below and follow it for additional examples and demonstrations on how this works.
[Images] Contact Sheet
This module allows you to create a contact sheet of multiple images.
[Images] Encode
This module allows you to take one or more files and convert them all to a consistent encoding method. If you have a folder full of images that you want to use and some are .gif images, some are .jpg images, and some are .png images, you may want to make sure they get reencoded for proper use with some other process. With this module, you can make sure they all get changed to .png format or whatever your desired image format is. When re-encoding images, the module uses the best quality settings on any image codecs that use any settings for balancing size over quality.
[Images] Overlay
This module overlays an image onto one or more input image files. Opacity, X offset, and Y offset can be specified. The image can optionally be resized to fit the input image.
[Images] Quantize
This module quantizes images, reducing the number of individual colors used in each individual image. Number of colors, color reduction method, and dithering method can be specified.
[Images] Rotate
This module allows you to take one or more files and either rotate them automatically to match any recorded sensor data in the image’s EXIF data, or explicitly rotate the image to any 90-degree angle as needed. For images taken with devices that have GPS and/or orientation sensors, these devices usually record EXIF information to the photos that they take. EXIF is an acronym for Exchangeable Image File Format and can record data such as the location where the image was taken as well as the orientation of the camera. If the camera was held at an angle different from the default, then the image when viewed in some applications which are not aware of how to display the image properly, may show the image as sideways or upside down when this happens. To fix such situations, the automatic setting of this module can be used to look at the orientation data for the image, and rotate it to match, then remove the orientation data from the image so that it displays as expected for all applications.
[JSON] Minify
This module formats an input JSON string to minimize the amount of whitespace making it smaller without altering the code. Note that minimization comes at the expense of code readability.
[JSON] Prettify
This module formats an input JSON string adding whitespace and linebreaks without altering the code in order to make it more easily legible.
[JSON] Render Html
This module renders a block of JSON data to HTML for visualization purposes. It can be used to display JSON data in a more user-friendly format, making it easier to read and understand the structure of the data.
[LogFiles] Archive
This is a specific task-driven module. It combines several steps into one that would otherwise require you to build the same functionality out of several steps with other base modules. Its primary focus is providing a quick way for managing an archive of log files. While we focus on log files here, it certainly could be used on any type of collection of files that you would want to handle in the same manner.
The module will archive log files, with the option to use a different folder for the archive from the source. When a log file is archived, it is moved into a compressed destination file, meaning the original raw log file is removed once it is successfully archived. The module allows you to optionally use the compression grouping features similar as to what is found in the [Files] Compress module for the compressed archive file(s). Then, after processing all those options, it also can automatically prune the archived .zip files to a certain age range. This bundles multiple module functionality all into one module while keeping the number of parameters to a minimum for the common task of managing application logfiles.
[Logic] Branch
This module causes the JobServer to immediately jump to a different step in the same job. This is useful for skipping steps, or for creating loops in a job.
[Logic] Compare And Branch
This module is used to control execution depending upon logic comparison of values specified in the module. The module will compare two values, and can jump to different steps when the comparison is less than/equal to/greater than.
[Logic] Contains
This module is used to control execution based on string value comparison. The module will check if a string contains another string, and can jump to different steps when the comparison is true or false. A regular expression can be used for the comparison.
[Logic] Stop
This module is used to immediately stop a job. The execution outcome of the job can be set to Success, Warning, or Failure. This is useful for stopping a job when an error condition is detected, or for stopping a job when it has completed its work.
[M365] Extract Attachments
This module is used to extract attachments from emails in Microsoft 365. It takes a list of message Ids (such as those from the M365 Inbox Watcher trigger) and then extracts the attachments from those emails.
[Machine] Activate Power Plan
This module provides a job with the means to control the local machine’s power plan. The active power plan will affect certain operational characteristics of the machine. These characteristics can control the power consumption and processor speed of the machine.
[Machine] Hardware Inventory
This module allows you to retrieve the general hardware inventory of the local or specified machine. When specifying a machine other than the local machine, the JobServer service must be running in an account with the proper domain trust relationship for domain member machines.
[Machine] Purge Downloads
This module will iterate through all the user profiles on the local machine and will purge the downloads folders of files left behind.
[Machine] Service Control
This module allows you to take action on the services which are installed on the local machine. This can be used in response to other steps in a job to start, stop or restart specific services. You may be asking what type of situations would you want to control various services on the machine? One example would be if you have a service from some third party vendor that might have a memory leak or some other resource problem with it. By using this in conjunction with the scheduler, you could periodically shutdown and restart the service to force it to release resources.
[Machine] Shutdown/Restart
This module allows you to shut down or restart a running machine. This can be used for the local machine as well as on any machine in a member or trusted domain. While this may have many uses, one example we will outline might be when you normally want all your network users to shut off their machines when they leave for the day. If you have a problematic end-user who constantly forgets to do this, you could easily force their machine to shutdown after a certain time each time using this module.
[Network] Http Action
This module allows you to generate a basic HTTP request of various types. The parameters can be used to build up the request you want to send to the webserver.
[Network] Http Ping
This module allows you to send an HTTP GET request to a specified URL. Its purpose is to send the request and get the returned HTTP status code of the request. This module is meant for purposes where you either need to send an HTTP request for an external site or process. Examples may be keeping a specific page of a website loaded in cache, or to do a basic status code check of a specified URL in order to make sure a site or webserver is alive and responding. This module is meant for quickly creating very simple HTTP requests. For other types of requests, use the more flexible [Network] Http Action module.
[Network] VPN
This module allows a job to start or stop a VPN that is defined in the Windows networking configuration. Found in Control Panel > Network and Internet > Network and Sharing Center in Windows 10 for example.
[Parameter] Set
This module is used set, increment, or decrement a local or global parameter’s value. Combined with the [Logic] Compare And Branch module, this allows you to create loops and conditional branches in your job.
[PDF] Merge
This module is used to merge multiple PDF files into a single PDF file. The module takes a list of PDF files as input and produces a single PDF file as output.
[PDF] Password Maintenance
This module is used to set/clear a PDF file’s passwords. The module takes a PDF file as input and produces a PDF file as output. Note that if the PDF is already protected by a password, the password must be provided in order to clear it or to set a new password. User & Owner passwords are supported.
[Perl] Execute
This module allows a step to call and execute a specified Perl script. In order to run the Perl script, a Perl processor must be installed on the local server. Currently this module looks for and uses an installation of Strawberry Perl in order to execute perl scripts.
[PGP] Decrypt
This module provides a way to decrypt any number of files that have been encrypted using PGP.
[PGP] Encrypt
This module provides a way to encrypt any number of files using the PGP encryption algorithm.
[Python] Execute
This module allows a step to call and execute a specified Python script. In order to run the Python script, a Python processor must be installed on the local server. Currently, this module looks for and uses an installation from www.python.org in order to execute python scripts.
[Shell] Command Line
This module is built to provide a quick method for executing a legacy command-line command such as: DIR, XCOPY, DEL, RMDIR, and so on.
[Shell] PowerShell Command
This module is built to provide a quick method for executing a PowerShell command.
[Shell] Sleep
This is a simple module. Its purpose is to delay for a specified number of seconds. Any job steps coming after the sleep command must wait until its countdown has finished. It is an ideal module to use for testing when learning how to use and configure job definitions in JobServer. It also helps account for potential lag between operations in a single step, ensuring that subsequent steps observe the expected results.
[Shell] Sleep Random
This is much like the [Shell] Sleep module, except that you can specify a range of seconds to sleep, and it will initiate a countdown for a random duration within that range. Like [Shell] Sleep, any job steps coming after it must wait until the countdown has finished.
[Slack] Send Message
This module allows a job to have the ability to send messages to a specified Slack channel.
[SMS] Send Message
This module allows your job to send an SMS message. The SMS Connection defined for the module will define how the system transmits messages via a messaging provider. Current, there is one supported provider, Twilio. For more information on configuring messaging providers for SMS, refer to the article on SMS Connections.
[SQL Server] Agent
This module allows a job to trigger a SQL Server Agent Job. This allows the JobServer to coordinate any activity it might perform in its own jobs with the SQL Server Agent jobs.
[SQL Server] Create Tables
This module creates tables in a SQL Server database based on the provided source data files. The data source files can be CSV or Excel format. The module reads the structure of the source data and executes the necessary SQL commands to create tables with appropriate columns and data types in the target SQL Server database..
[SQL Server] Execute
This module is built to provide a quick method for executing a SQL command on a Microsoft SQL Server database.
[SQL Server] Export
This module allows a quick method for creating data output from a SQL command. A variety of options allow for a wide variety of configurations.
[SQL Server] Get Value
This module executes a SQL command on specified SQL Server and retrieves a singular value as the result. The module is designed to return a single value from the database, which can be used in subsequent steps of the workflow. It allows you to specify the SQL command to be executed and the connection details for the SQL Server.
[SQL Server] Import
This module allows a quick method for bringing data from external files into a SQL database. A variety of options allow for a wide range of configurations.
[SQL Server] SSAS Execute
This module allows the execution of a SQL Server Analysis Services XML command.
[Teams] Copy/Move From Remote
This module provides a job the ability to copy or move files from the remote Teams channel or folder, to the local machine or network.
[Teams] Copy/Move To Remote
This module provides a job the ability to copy or move files from the local machine or network to the remote Teams channel or folder.
[Teams] Find Files
This module provides a job the ability to locate files of interest on a remote Teams site.
[Teams] Send Message
This modules provides a job the ability to send a message to a Microsoft Teams channel.
[Telegram] Send Message
This module provides a method for jobs to send a message to a Telegram Channel.
[Twitter] Send Message
This module provides a method for jobs to send a message via X/Twitter.
Custom Modules
All of the included triggers and modules in JobServer.NET already provide a variety of useful functionality. That existing functionality can be built on even more by implementing your own custom modules. The creation and installation of a custom module allows you to include your module as a normal step in any new or existing jobs. It can be combined with any of the existing modules, as well as a part of a single job or even as parts of multiple steps using multiple custom modules of your own.
Requirements for Creating Custom Modules
The minimum requirements for a development machine to build custom JobServer.NET modules on is similar to the baseline requirements of JobServer itself, as listed in prior sections, along with the addition of a supported version of Visual Studio.
To create and build a custom module for JobServer.NET, you need to use a supported version of Visual Studio that supports targeting .NET Framework 4.8 and later. This means at least Visual Studio 2015 and newer, or versions back to Visual Studio 2010 with the appropriate updates and upgrades to the .NET Framework installed.
Once you have that, the only other development tool needed is the freely available Visual Studio templates for JobServer.NET or the JobServer.NET interface DLLs which are available via NuGet.
Creating a Custom Module with a Visual Studio Project
A custom module is implemented as a .NET Class Library. Thus, a module does not have a user interface of its own; it relies on the functionality built into JobServer.NET for creating its user interface. This is also due to the fact that the code in your module runs without an interactive user context. This is because it is run from within a Windows service. Therefore, it is important to keep in mind that there are certain things you cannot do when running in such a service that you would for desktop style applications. In this section, we will take an overall look at how to create your own module.
Creating a New Custom Module
To start, launch Visual Studio and pick the option to Create a New Project. Select the project template for Class Library (.NET Framework). Pick the name and location for your project. For our example we are going to name it “MyCaseConverter”. The selected project framework should be .NET Framework 4.8. Rename the default empty “Class1.cs” to something useful. For our example we are going to rename it to “CaseConverter.cs”.
The first step to making this a JobServer module is to add the interface references by going to Manage NuGet Packages for the project. Select the Browse tab and search for JobServer.NET. You will see it listed as XCENT.JobServer.Plugin. Just select that and click the Install option in the NuGet manger window.

Once installed, add using statements for XCENT.JobServer.Abstract and XCENT.JobServer.Plugin to your CaseConverter class. Then modify the declaration for the CaseConverter class so that it derives from ModuleBase. Once you do that, you will need to add the following lines to the class.
    public override string Description { get { return "My Case Converter"; } }
    public override string InfoURL { get { return string.Empty; } }

    [ParamDef(Caption: "A list of files to convert", ModuleParameterDirection: ModuleParameterDirection.In, ParameterOptions: ParameterOptions.Required)]
    public List<string> FileSource { get; set; }

    // The Guid in Guid.Parse should be a unique value that identifies your module. Each custom module should have its own Guid. The one shown below (45AF5DEF...) is just an example. You can generate a new Guid value using Visual Studio or online tools for generating Guids.
    public CaseConverter() : base("MyCaseConverter", "MyCustomModules", "MyCaseConverter", null, Guid.Parse("45AF5DEF-B8D8-4ACC-8582-11E0CB40F79D")) {
    }

    public override ModuleRunResult OnRun() {
        return new ModuleRunResult() { Outcome = ExecutionOutcome.Success };
    }
This is the minimum you need to frame out your first custom module. When you use the installer for JobServer.NET, one of the installation options is to install a template for Visual Studio. If you choose to install the template for Visual Studio, you can save some of the steps above as it will create this overall structure for you on new JobServer plugin projects. Note, plugins refer to the (API) interface for both custom Modules and Triggers. However, the current release is only supporting custom modules at the current time.
At this point, there is no code in here that does anything useful. If you built this and installed it as is, it would show up in JobServer and would appear to put on the act of doing something, but it really is getting a whole bunch of nothing done so far. So, what is the basic structure we have here set up to do? This is going to be a module that takes a single input parameter and is going to expect that to be a single file or list of files that the module is going to process. To do something useful, we just add some code to the OnRun method. So, we will inject the following code into the top of this method. This code simply renames all the files it is provided to all lowercase filenames.
In the above code, notice that the constructor for the class passes a few important parameters back to ModuleBase. The first one is the name that your module will show up in the JobServer.NET user interface as. The second is the category for your module. In current versions of JobServer, this shows up as a prefix on your module name, and this one would show up as [MyCustomModules] MyCaseConverter. The category should be used to make sure your module names are unique and do not conflict with any others. We recommend that for any real modules you create, use your organization name, or org name and department as a way to both name and organize your own modules.
    try {
        foreach (string file in FileSource) {
            if (File.Exists(file)) {
                FileInfo fi = new FileInfo(file);
                if (fi.Name != fi.Name.ToLower()) {
                    this.SetMessage("Processing file:" + fi.Name);
                    string newname = Path.Combine(fi.DirectoryName, fi.Name.ToLower());
                    File.Move(file, newname);
                }
            }
        }
    }
    catch (Exception ex) {
        this.WriteLogEntry(LogEntryLevel.Error, "Exception in module", ex.ToString());
        return new ModuleRunResult() { Outcome = ExecutionOutcome.Failure };
    }
We now see a simple implementation of processing the input files and returning a valid status based on success or failure of the processing. This should now build correctly and if so, provides you with a DLL that can be installed as a custom module.
Modifying an Existing Assembly to Become a Custom Module
If you have existing code that you would like to build as a custom module, and the functional part of your code is already in the format of a .NET Class Assembly, then setting it up as a module should be not much different than creating the example in the previous section. All you should need to do is add the XCENT.JobServer.Plugin to your project, create a class to act as a wrapper to implement the JobServer Plugin interface as was done in the above example. Set up any values you want to feed into your code as parameters and in the OnRun method for your wrapper class, just call your existing code. Of course, this is a little simplified, as at a minimum you will likely want to review the various supported parameter types and the various options you can use with each. We cover these in more detail in the following sections.
Installing a Custom Module in JobServer.NET
Once you have written your first custom module and built it, you will need to install it for JobServer.NET to be able to use it in your jobs. Currently, this is a simple manual process that does require for you to have administrative access to the folder your JobServer.NET application is installed to. Typically, the default installation path for JobServer modules will be something like “C:\Program Files\XCENT\JobServer.NET\Modules”. Once you locate this folder, we recommend creating a folder within this using the name of your organization. If you might have a number of custom modules, then another recommendation would be to even add an additional sub-folder under your organizational folder with the department or process name that is suited for you modules. JobServer.NET will automatically search through all folders in the Modules branch so you are able to create any organizational structure you might want for managing and deploying a variety of custom modules.
When you have decided on your folder naming convention, all you need to do to deploy your custom module is to copy all the compiled files (DLLs, etc.) from the Visual Studio output folder to this folder. Once the files are copied to here, JobServer.NET should detect that they have been added and you should now be able to select your custom module just like if it was any of the other installed modules.
Finding Out More on Creating Custom Modules
In the preceding sections, we have outlined the very basics of getting started creating your own custom modules for use with JobServer.NET. While this does provide you with the essentials you need to create a functional custom module, we do provide more detailed information in various other articles along with some sample implementation and source code. Please see the following online article for more details: https://kb.jobserver.net/Q100030
Introducing FileGroups When Using FileLists
When implementing a custom module, you will notice that there are quite a few modules which accept a list of files as an input parameter usually with the name FileSource and might provide output of processed files as FileList or other parameter names. We refer to all of these type of parameters as FileLists as a general name. When used as an input parameter, the list of files can be supplied as a simple list of files including their fully qualified paths as shown in this example.
C:\MyApplicationData\Incoming\Orders_2021-01-22_09-12-32.json
C:\MyApplicationData\Incoming\Orders_2021-01-22_09-46-01.json
C:\MyApplicationData\Incoming\Orders_2021-01-22_10-33-18.json
C:\MyApplicationData\Incoming\Orders_2021-01-22_11-01-46.json
This would be accepted as a valid list of files that the module can process. However, if you look at the output from many of the included modules which show a list of files, and most significantly the FileList output parameter from the [Files] Find module, you will notice the data looks a little different from this simple format. Internally all the included modules support a more structured definition of this data which allows certain modules to have additional functionality. This type of structured data is known as a FileGroup. This structured data is in a Json data format in which the data describes itself. It does this by including identifying tags directly in the data stream. For example, if the above list of files had come as a result of output from a [Files] Find module, the data would instead look like this example.
{
   "DataType":"FileGroups",
   "DataVersion":"1.0",
   "BasePath":"C:\MyApplicationData",
   "Parser":"Unstructured",
   "Groups":[
      {
         "Path":"C:\MyApplicationData\Incoming",
         "Files":[
            "C:\MyApplicationData\Incoming\Orders_2021-01-22_09-12-32.json",
            "C:\MyApplicationData\Incoming\Orders_2021-01-22_09-46-01.json",
            "C:\MyApplicationData\Incoming\Orders_2021-01-22_10-33-18.json",
            "C:\MyApplicationData\Incoming\Orders_2021-01-22_11-01-46.json"
         ]
      },
   ]
}
2026-02-12 TODO - DPM Rewrite below 2 paragraphs to reference FileGroup structure instead of the old tags
In this example, you can see that the data starts with an identifying tag [FILEGROUP] which tells us what kind of information is in this stream of data. Then we see this is followed by a series of records, each with a tag preceding very similar looking data. Here we see right in the first record, there is some additional information that wasn’t in the previous example. The first record uses the [D] tag which denotes that this is the folder all the following records were located within. Thus, in this example, the data is telling us the find module started looking for files in this folder. This is usually not relevant for many modules that just process individual files, but it has benefits for modules that have options for working with the hierarchy of folders and the set of files contained within it. You can find out more detail about how this can be used in a knowledgebase article linked below.
Notice that the rest of the data looks nearly identical to the original example except that each record starts with the [F] tag to denote the record is a file. The number of files is not limited and can continue for as long as needed. We recommend using the same FileGroup structure for supporting lists of files and of course you will need to if you want to use the output of the included modules in your own custom modules. More details about the FileGroup structure and how it is beneficial to various use cases can be found at the following article.
https://kb.jobserver.net/Q100038
Additional References
Parameter Types and Options
Modules support several different parameter types and all of them support a few different options which we will see outlined in this section.
Common Options to All Types
There are some options for parameters that are common to all the supported types. Some of the more obvious ones would be the Caption and Description attributes. The caption is used as the prompt for the parameter value when editing a step, whereas the description is used to provide the longer more detailed narrative about how the parameter is used when the information button is clicked on for the parameter while in the editor.
A parameter is normally configured to not be required when it is specified. This behavior can be explicitly defined by supplying the ParameterOptions: ParameterOptions.Required attribute as needed. When this is true, then when the job module is edited, the parameter will be shown as being required. If the value is not specified for a required parameter, then the job will not be able to be enabled or run until it is supplied.
Parameters can be used for sending values into a module, as well as a way for a module to emit a value upon completion. The emitted value can then be used in modules in other steps of a job. The way a parameter defines this behavior is by defining the value for its ModuleParameterDirection attribute. Parameters that only define a value for input into the module would be set to In, where a parameter that only emits a value when the module completes execution is set to Out. There also can be times when you want to use a parameter of the same name as both an input and an output of the module. This can be done by specifying that the parameter is set to InOut.
The attribute named Default is also common to all types but does behave slightly differently for each because its value is always going to be a string value. This attribute does exactly what you might imagine in that it provides a default value for the parameter when creating a new entry unless the value is overridden when defining or editing the values in a job step. Because this value is always a single string, any parameter that is not a string type, must use a value that can be successfully parsed to the native type. Thus, if a default is specified as “abc” for a numeric type, then the default value will not work for that type. A successful default for a numeric type might look like “123”.
Additional parameters have effect based on the type chosen for the parameter. The supported types are a subset of the base .NET variable types.
String
The string type is the most used parameter type. When a type is a string, it can accept a freeform value that is not constrained except if other attributes are added for the parameter. If the ParameterOptions.Password is specified, when the value is entered in the editor the characters are obscured from view.
List of Strings
The list of string type is used for a parameter when the input is expected to be a multiple line list of values. A list of filenames is an example of when this type is used. There are no additional attributes that affect this type of parameter.
Numeric
The various numeric types in the .NET Framework are all treated similarly here and therefore we will talk about them all as a single type. There is a trio of attributes for the numeric types that are useful. The first, DecimalPlaces, affects how the control for the numeric value allows input and formatting of the value. The other two MinValue and MaxValue allow you to define a lower and/or upper limit to the value for the parameter. Either one, or both, of these attributes can be specified. In the parameter editor, only valid numeric values will be able to be entered into the control.
DateTime
The datetime type is used for a parameter when the input is expected to be a Date. The control for this type in the parameter editor only allows for date values to be specified. It does not currently support the time component of the .NET Framework’s intrinsic DateTime type. There are no additional attributes that affect this type of parameter. In the parameter editor, the control displays and formats the date correctly as well as only allowing entry of a valid date.
Boolean
The boolean type is used as a parameter when only a true or false state is wanted for the parameters value. The parameter editor displays these values as a checkbox control.
Enum
The enum type is used as a parameter type when one item of a defined set of items should be selected as the valid value. The parameter editor displays these as a dropdown list control. If a default value is not specified, the control will not have an item selected initially for new entries. If the default is provided, it should match the stringified value of the enum.
Flags
The enum type can also be used when you need to select multiple options from a defined set of items. In this case the enum must be defined as a set of flags using the [Flags] attribute on the enum definition. The parameter editor displays these as a multiple selection control with convenient options for quickly selecting or deselecting all items. If the default is provided, it should match the stringified value of the individual items in the enum.
Type and Attribute combinations
Here we see an overview of where the combinations of types and attributes can be used together:
| Attributes | String | List of strings | Numeric | DateTime | Boolean | Enum | Flags |
|---|---|---|---|---|---|---|---|
| Caption | ✓ | ✓ | ✓ | ✓ | ✓ | ✓ | ✓ |
| DecimalPlaces | ✓ | ||||||
| Default | ✓ | ✓ | ✓ | ✓ | ✓ | ✓ | ✓ |
| Description | ✓ | ✓ | ✓ | ✓ | ✓ | ✓ | ✓ |
| ParameterOptions | ✓ | ✓ | ✓ | ✓ | ✓ | ✓ | ✓ |
| MaxValue | ✓ | ||||||
| MinValue | ✓ | ||||||
| ModuleParameterDirection | ✓ | ✓ | ✓ | ✓ | ✓ | ✓ | ✓ |
The variety of options for creating parameters to your own custom modules provides flexibility for many types of uses. For a more hands on option for trying the various parameters types, you can try the sample project available at the article below.
https://kb.jobserver.net/Q100031
Advanced Configuration
This section contains information on configuration of some of the options in JobServer.NET that are not part of the basic or default settings when the application is first installed.
Authentication Options
When JobServer.NET is installed, it uses the built-in Windows Authentication to define who can login to the management application. Because of this, the behavior changes slightly based on whether or not the machine the JobServer service is installed on is a standalone machine, or if it is a member of an Active Directory network. In either of these cases, by default you would need to use an account with administrator account level privileges to login to the manager application.
There may be situation where you want to use different accounts for logging into the management application that are not members of the local or an Active Directory administrators group. When you want to allow an account to have the ability to login to the management application, you would need to create a new group with a specific name called JobServer_Edit and then assign the accounts that should have access, as members of this new group. For a stand-alone machine that is not part of Active Directory, you can just create this group on the local machine and assign the local accounts that should have access to it. For a machine that is a member of an Active Directory domain, then you create the group in the domain in which you want to assign the members from. Then add the individual accounts in the domain to the new group domain.
Management Port
When JobServer.NET is installed, it defaults to using port 7901 as its management port on the server running the service. Although we highly suggest not changing the port used, it is possible to do so if it is absolutely required. First, in the folder the application is installed in, there is a plain text configuration file named JobServer.exe.config. If you open this file in a plain text editor, if you find the key entry for WebApiPort, you will see that its current value is the default of 7901. Change the value to a new unused port on the server and save the file. Important note before saving be absolutely certain you are using a plain text editor!
Next, since the management application uses an encrypted connection to communicate with the service, the service needs the proper configuration and permissions for setting up the secure channel. To do this, you must run a command line command with the proper parameters. First, start by opening an elevated command line console by clicking Start, type cmd.exe into the search bar, right-click on the command prompt icon and select the Run as Administrator option from the menu. This will open an elevated command prompt window which you can now type in the following line, changing the port number, shown as ####, to the new port number and hit enter.
netsh.exe http add sslcert ipport=0.0.0.0:#### appid={12345678-db90-4b66-8b01-88f7af2e36bf} certhash=DEF23F25EFC721D4FD892CACC4AD6FF015F71494
The entry above is all one line when typing it in, so do not hit enter until the whole thing is typed in. Again, be sure to change the pound-sign (hash-mark / octothorpe) characters to your desired new port. If for some reason you make a mistake and create an entry for a wrong port value, you should remove the errant entry by using the following command.
netsh.exe http delete sslcert 0.0.0.0:####
This will remove a port assignment if it is no longer needed or was created accidentally by mistyping the first command.
Once this is done, you will need to restart the JobServer.NET service in order to run it on the new port. First, be sure to close any open manager applications which may be connected to the service. Next, in the machines Services applet, locate the XCENT JobServer.NET service and right-click on it, then select the Restart option. Once the service is restarted, you should now be able to open the manager application, change the port number to the new port, and then can connect to the JobServer.NET service using the alternate port number.
Service Account
When JobServer.NET is installed, it defaults to creating the service to run under the machine’s LocalSystem account. For machines that are installed as standalone servers, then this means that the JobServer will only be able to access any of the direct resources located on that machine such as locally attached disks and filesystems. The exceptions would be when using any modules where the module must be given credentials to access a remote resource, such as an FTP server for any of the FTP based modules.
For machines that are members of an Active Directory network, the default installation of the service running under the machine’s LocalSystem account means that the JobServer is restricted to direct access to resource on the installed machine only. To allow any of the modules in the job steps to access network resources, you would need to change the account that JobServer uses to allow and control access to the network resources. When reviewing access to domain network resources, we are specifically referring to endpoints such as UNC paths to a share and folder on a specific network machine, or to a DFS namespace roots and folders on the network.
The easiest method to opening up network resources to JobServer.NET and any of the configured job definitions is by changing the account that the JobServer.NET service uses to an account on the domain with administrator rights. This gives the service the most access to published network resources in a default installation. This may be fine for small installations and where the server(s) the JobServer.NET service is running on a secure machine. When we refer to a secure machine in this sense, it means a machine that has both good strong user credentials for your administrative (and all) accounts and logins. And in addition, also has good strong physical security in that nobody has any casual access to the machine.

Whenever possible, it is best to use a more fine-grained approach to securing critical machines on your network and when used with JobServer.NET. It is certainly more work to set up and configure but grants you the ability to precisely control the access that any of the installed modules on a JobServer installation has access to across your network. The following steps outline how to set up a single installation of JobServer.NET on one server in your Active Directory domain, but this can be scaled out to multiple servers as needed.
We will use the fictional name “MyDomain” as the name of your Active Directory domain in this example. Certainly, you want to substitute your own domain for this in the examples. We mention this since we will also use a few other example names that are used to illustrate the relationship between the various items, and you are certainly able to name them as you see fit for your network or naming conventions. The specific items this applies to is an account to create in the domain named JobServerService and a local group you create on each machine where JobServer is installed called JobServerServiceGroup. Now let us look at how we would configure this for a more constrained approach.
First you create the user account you want the JobServer.NET service to run under in your domain. Under your Active Directory Users add the new account we will creatively call JobServerService under your domain “MyDomain”. At this point, if you already know what shares or other UNC paths you need to grant access permissions for the account, go ahead and add those to the account now. Thus, if you have a folder on your network where you will have modules sending and receiving files from an external FTP endpoint, you might have some sub-folders you use for various parts of the process, but the top-level folder containing them such as \\MyServer\Vendors\AcmeCo you would add Full Access permissions to account MyDomain\JobServerService to it for all the sub-folders to be accessible to the JobServer instance. Then you would repeat this for any other specific locations on your network where the JobServer will need to have file system access.
Now onto the steps to configuring the service to run under the domain account for your member server. The first part is to open Computer Management on the JobServer machine and under Local Users and Groups, you want to add a new group call JobServerServiceGroup. Once that is created, you can now add the network user MyDomain\JobServerService to this new group. After this is complete, you want to open the Local Security Policy app on the JobServer machine and under Local Policies, find and select the User Rights Assignment folder. When you have done this, you should now be able to locate and open the setting for Log on as a service. There will be entries here already, and we are not going to touch these. We just want to use the Add User or Group button to allow us to add the local group you created named JobServerServiceGroup here. These steps so far are just getting the account able to be used for running the service, now with that completed, we can move onto the next part.
The final part of configuring the machine to run JobServer.NET under the Active Directory domain account is to give it the necessary local permissions on the machine. There are two parts to this, the file system level permissions, and the network access permissions. First, you should already have JobServer installed on this machine. If you used the default options, it should use the following local paths on your boot volume. If you customized your installation, you would need to identify your customized paths to each of these. Locate the path for application data, which defaults to C:\ProgramData\XCENT and grant Full Permissions for this folder to the local JobServerServiceGroup. Next will be the path that the application is installed in, which defaults to C:\Program Files\XCENT and grant Full Permissions for this folder to the local JobServerServiceGroup.
With the local file system level permissions completed, now we just have to set up the network access permissions for the service. To do this, you will need to use the net shell (netsh.exe) command in an elevated command prompt. Of course, this is done by right clicking on the cmd.exe command line icon and selecting the Run As Administrator option from the pop-up menu. When the elevated command prompt opens, you will just need to enter the following command.
netsh http add urlacl url=https://*:7901/ user=JobServerServiceGroup
When you have completed these steps, you are now able to change the LogOn credentials for the service to the domain account and will be able to restart the JobServer.NET service under the new login with the more restrictive control. When you have successfully completed that, you will just need to remember in the future that as you add or change any job definitions, that if it involves changing or adding any references to Active Directory resources, you will just need to include adding or changing the permissions for the domain account also.
For additional details on configuration of Active Directory network accounts with JobServer, see the following article.